Set up Firebase for your static site
This guide walks you through the shared Firebase setup that any of our use cases relying on Firebase reference (Kanban, blog comments, internal admin tools, multiplayer apps…). You'll create a Firebase project, enable a Firestore database, set up email/password authentication, register a web app, and copy the public credentials your static site needs.
It's the same steps every Firebase-backed Flexweg project starts from — do them once, then your project's tutorial picks up at "apply your project's Firestore security rules" and ".env configuration".
What you'll get
- A Firebase project with Firestore Database in production mode
- Email/password authentication enabled, with a bootstrap admin account
- A registered web app + the 6 public config values you'll paste into your project's
.env
Prerequisites
- A Google account (any Gmail address works) to sign in to Firebase.
- Your project's tutorial open in another tab — at the end of this setup you'll switch back to it to apply security rules and configure the local app.
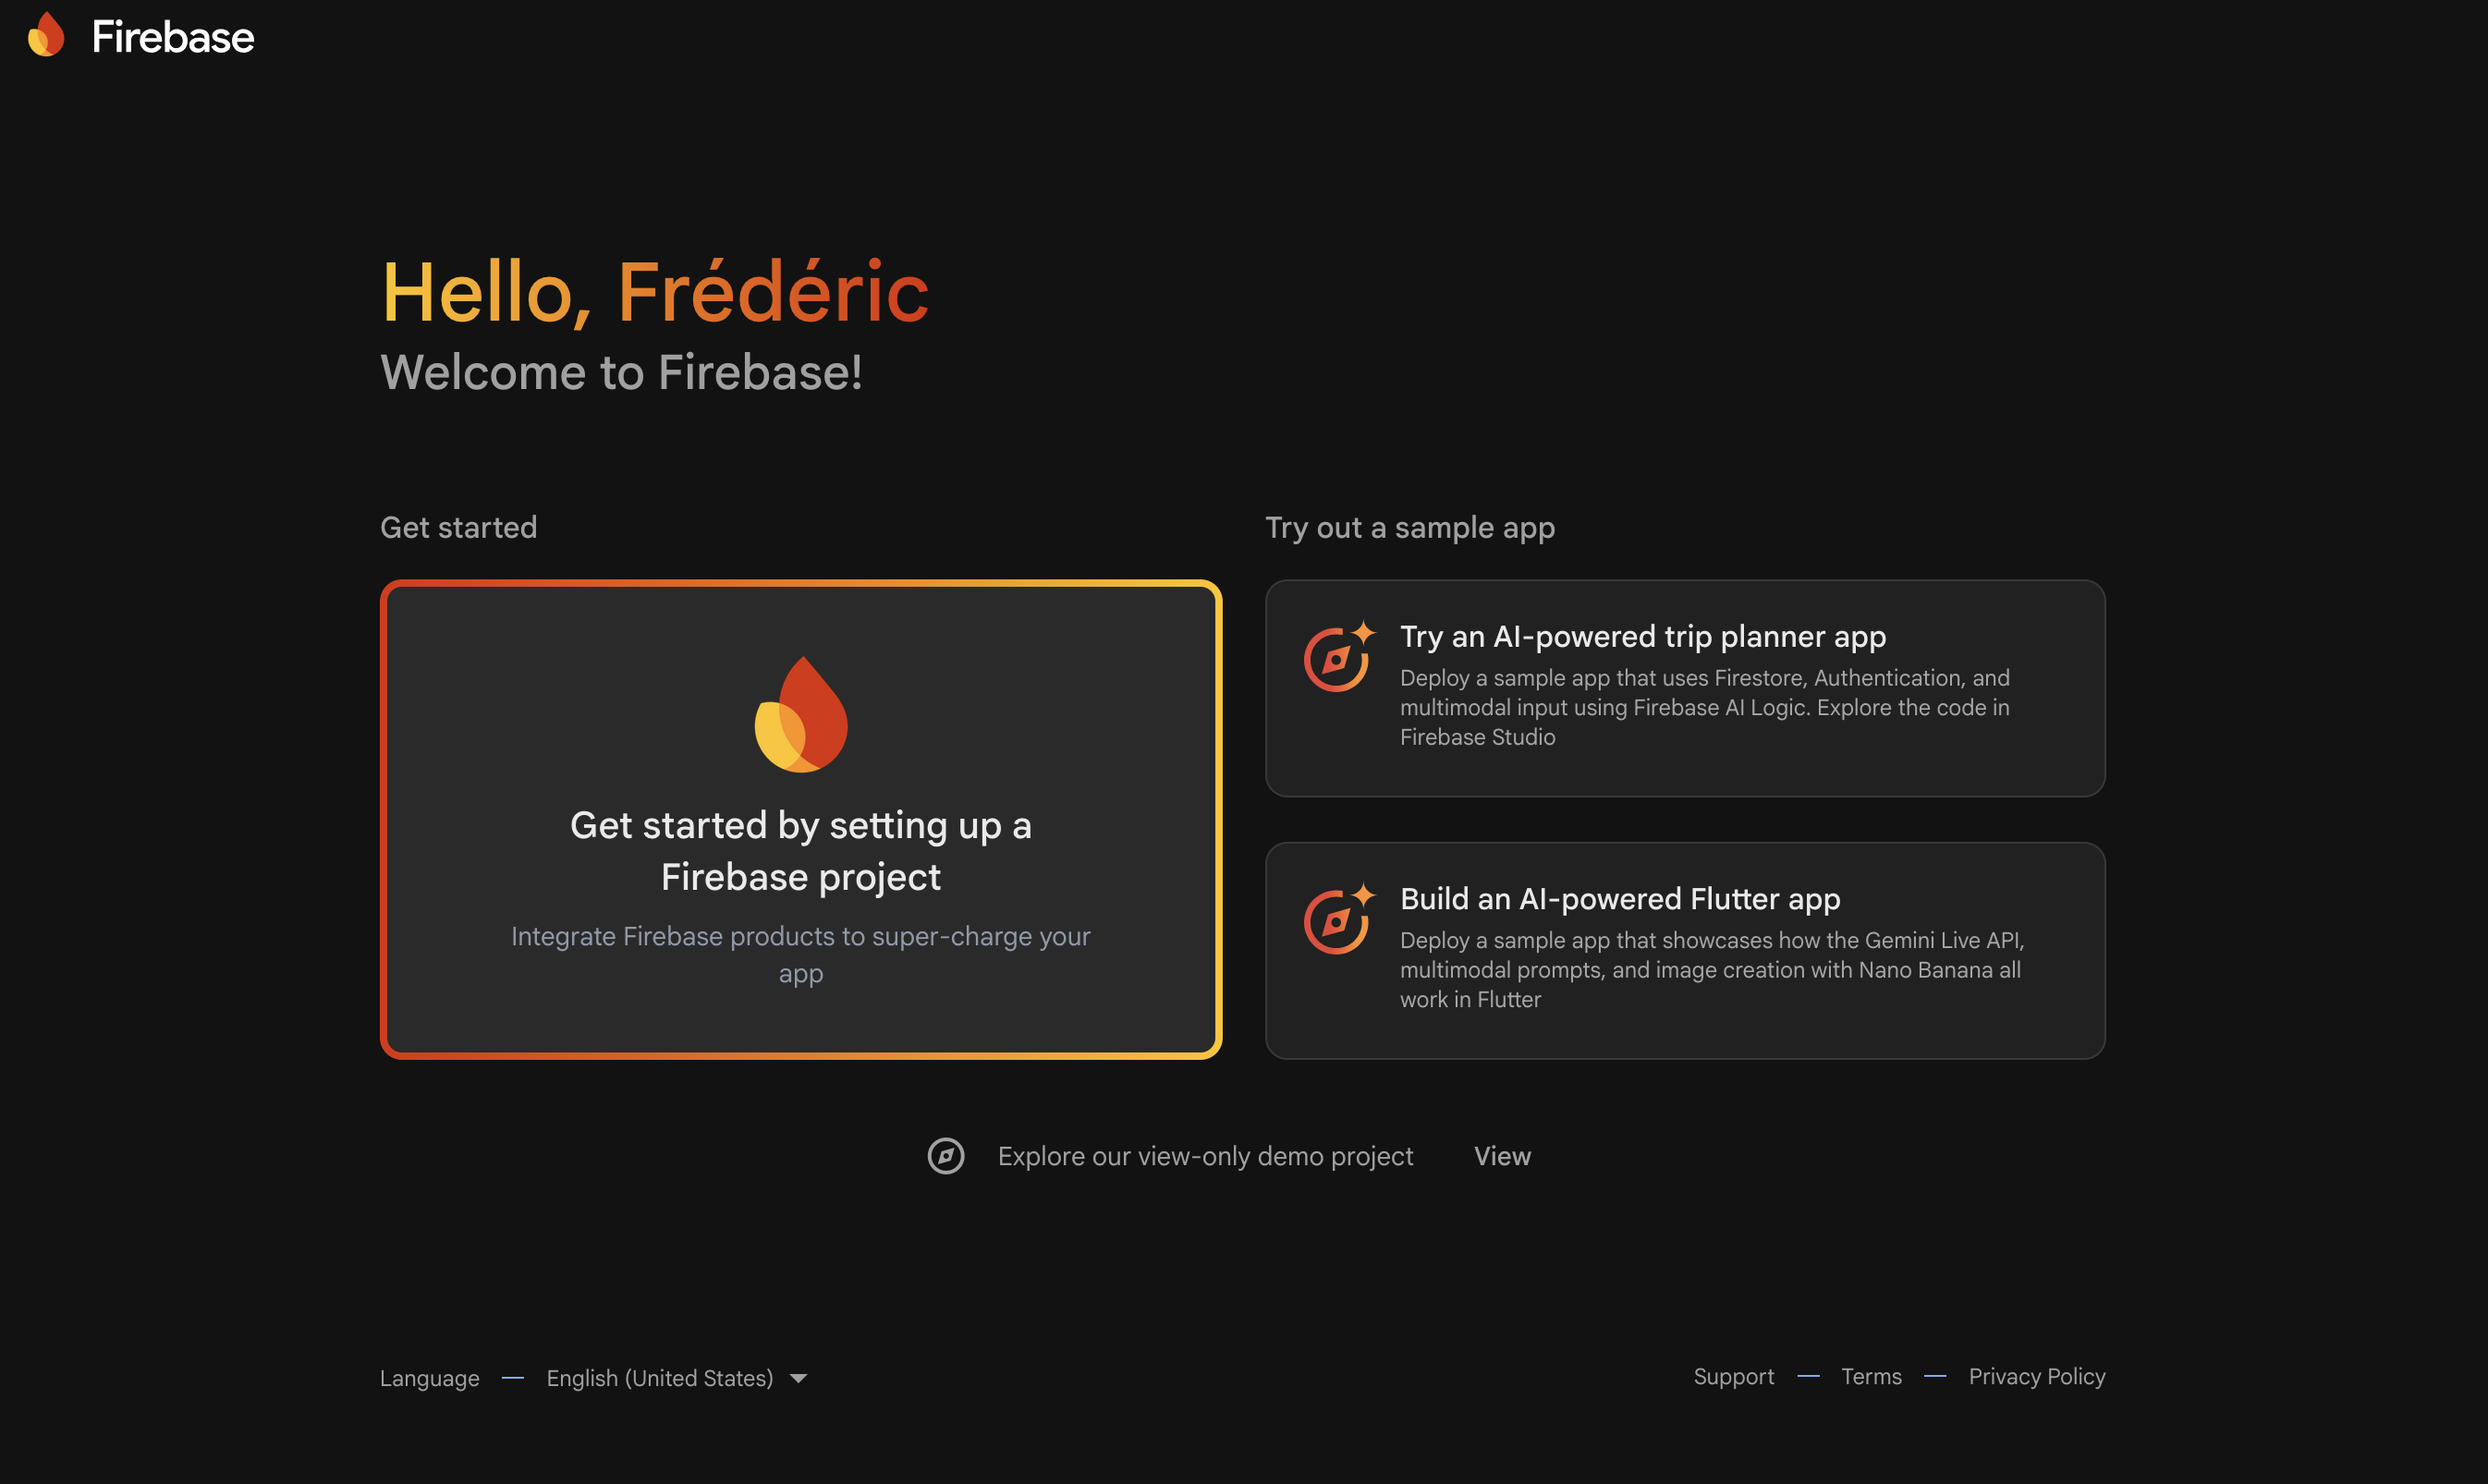
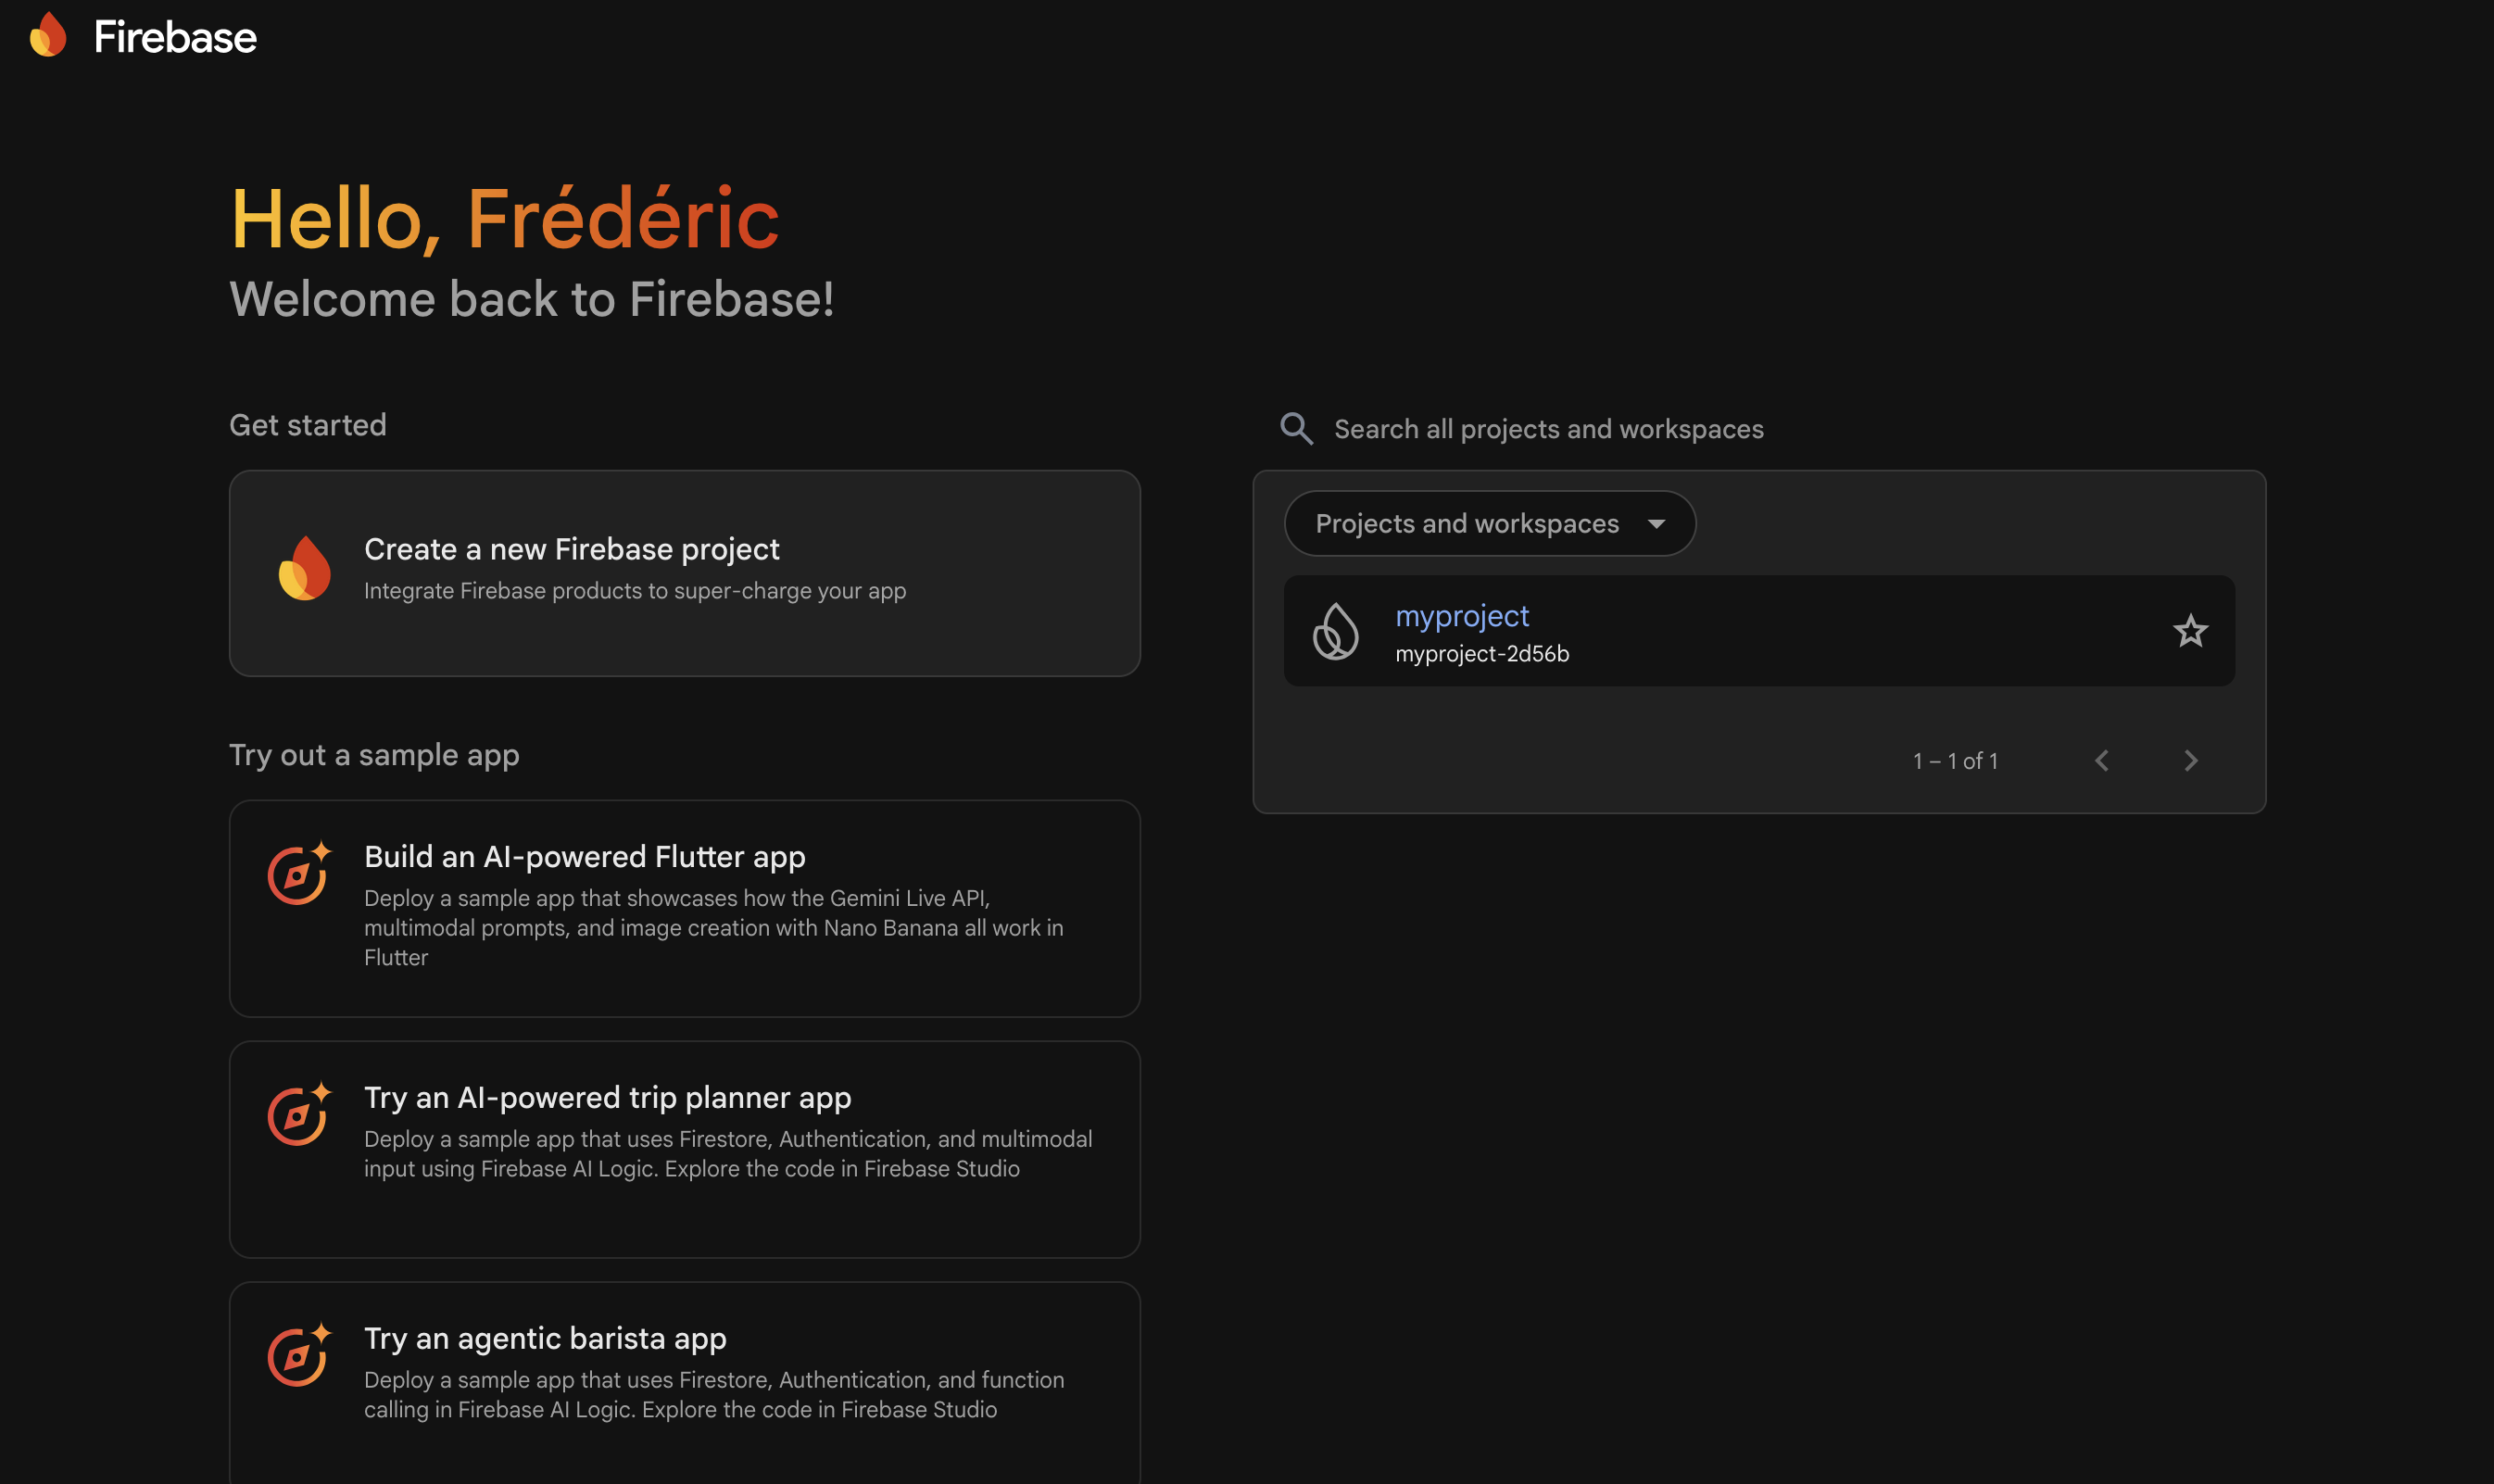
Step 1 — Open the Firebase console
On the Firebase home page (once signed in), click Get started by setting up a Firebase project.
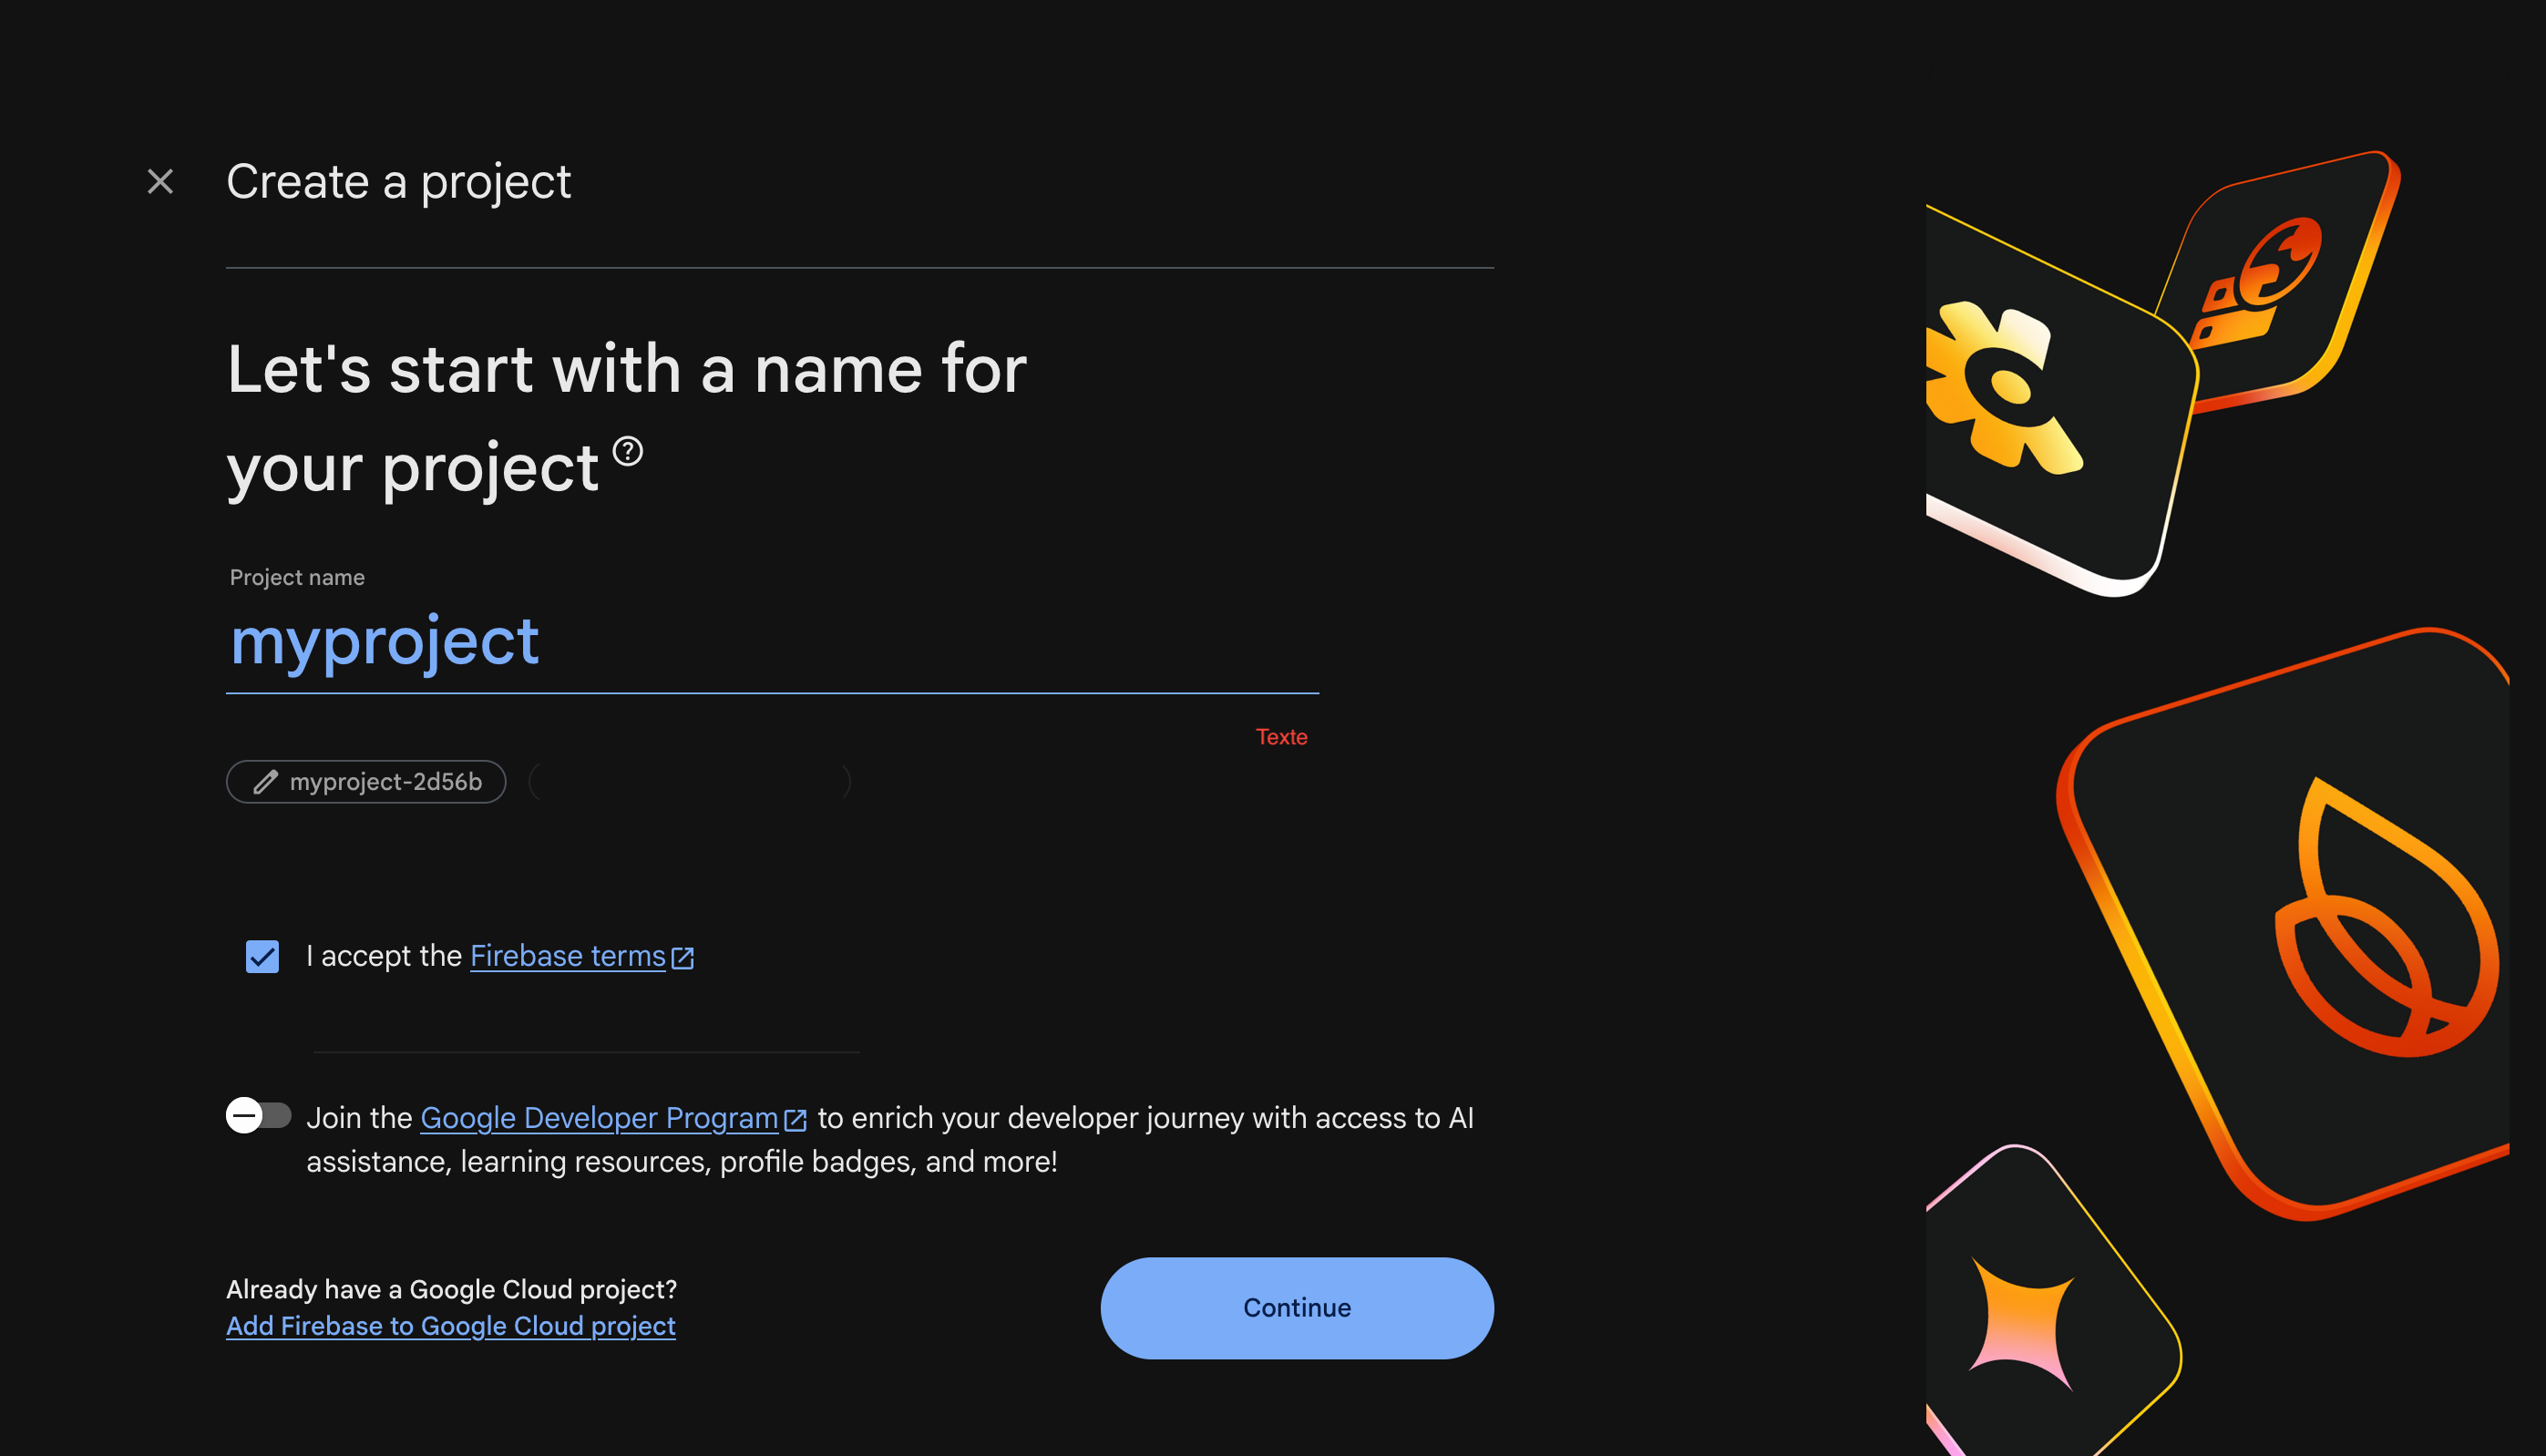
Step 2 — Name your project
Enter the name of your project and click Continue.
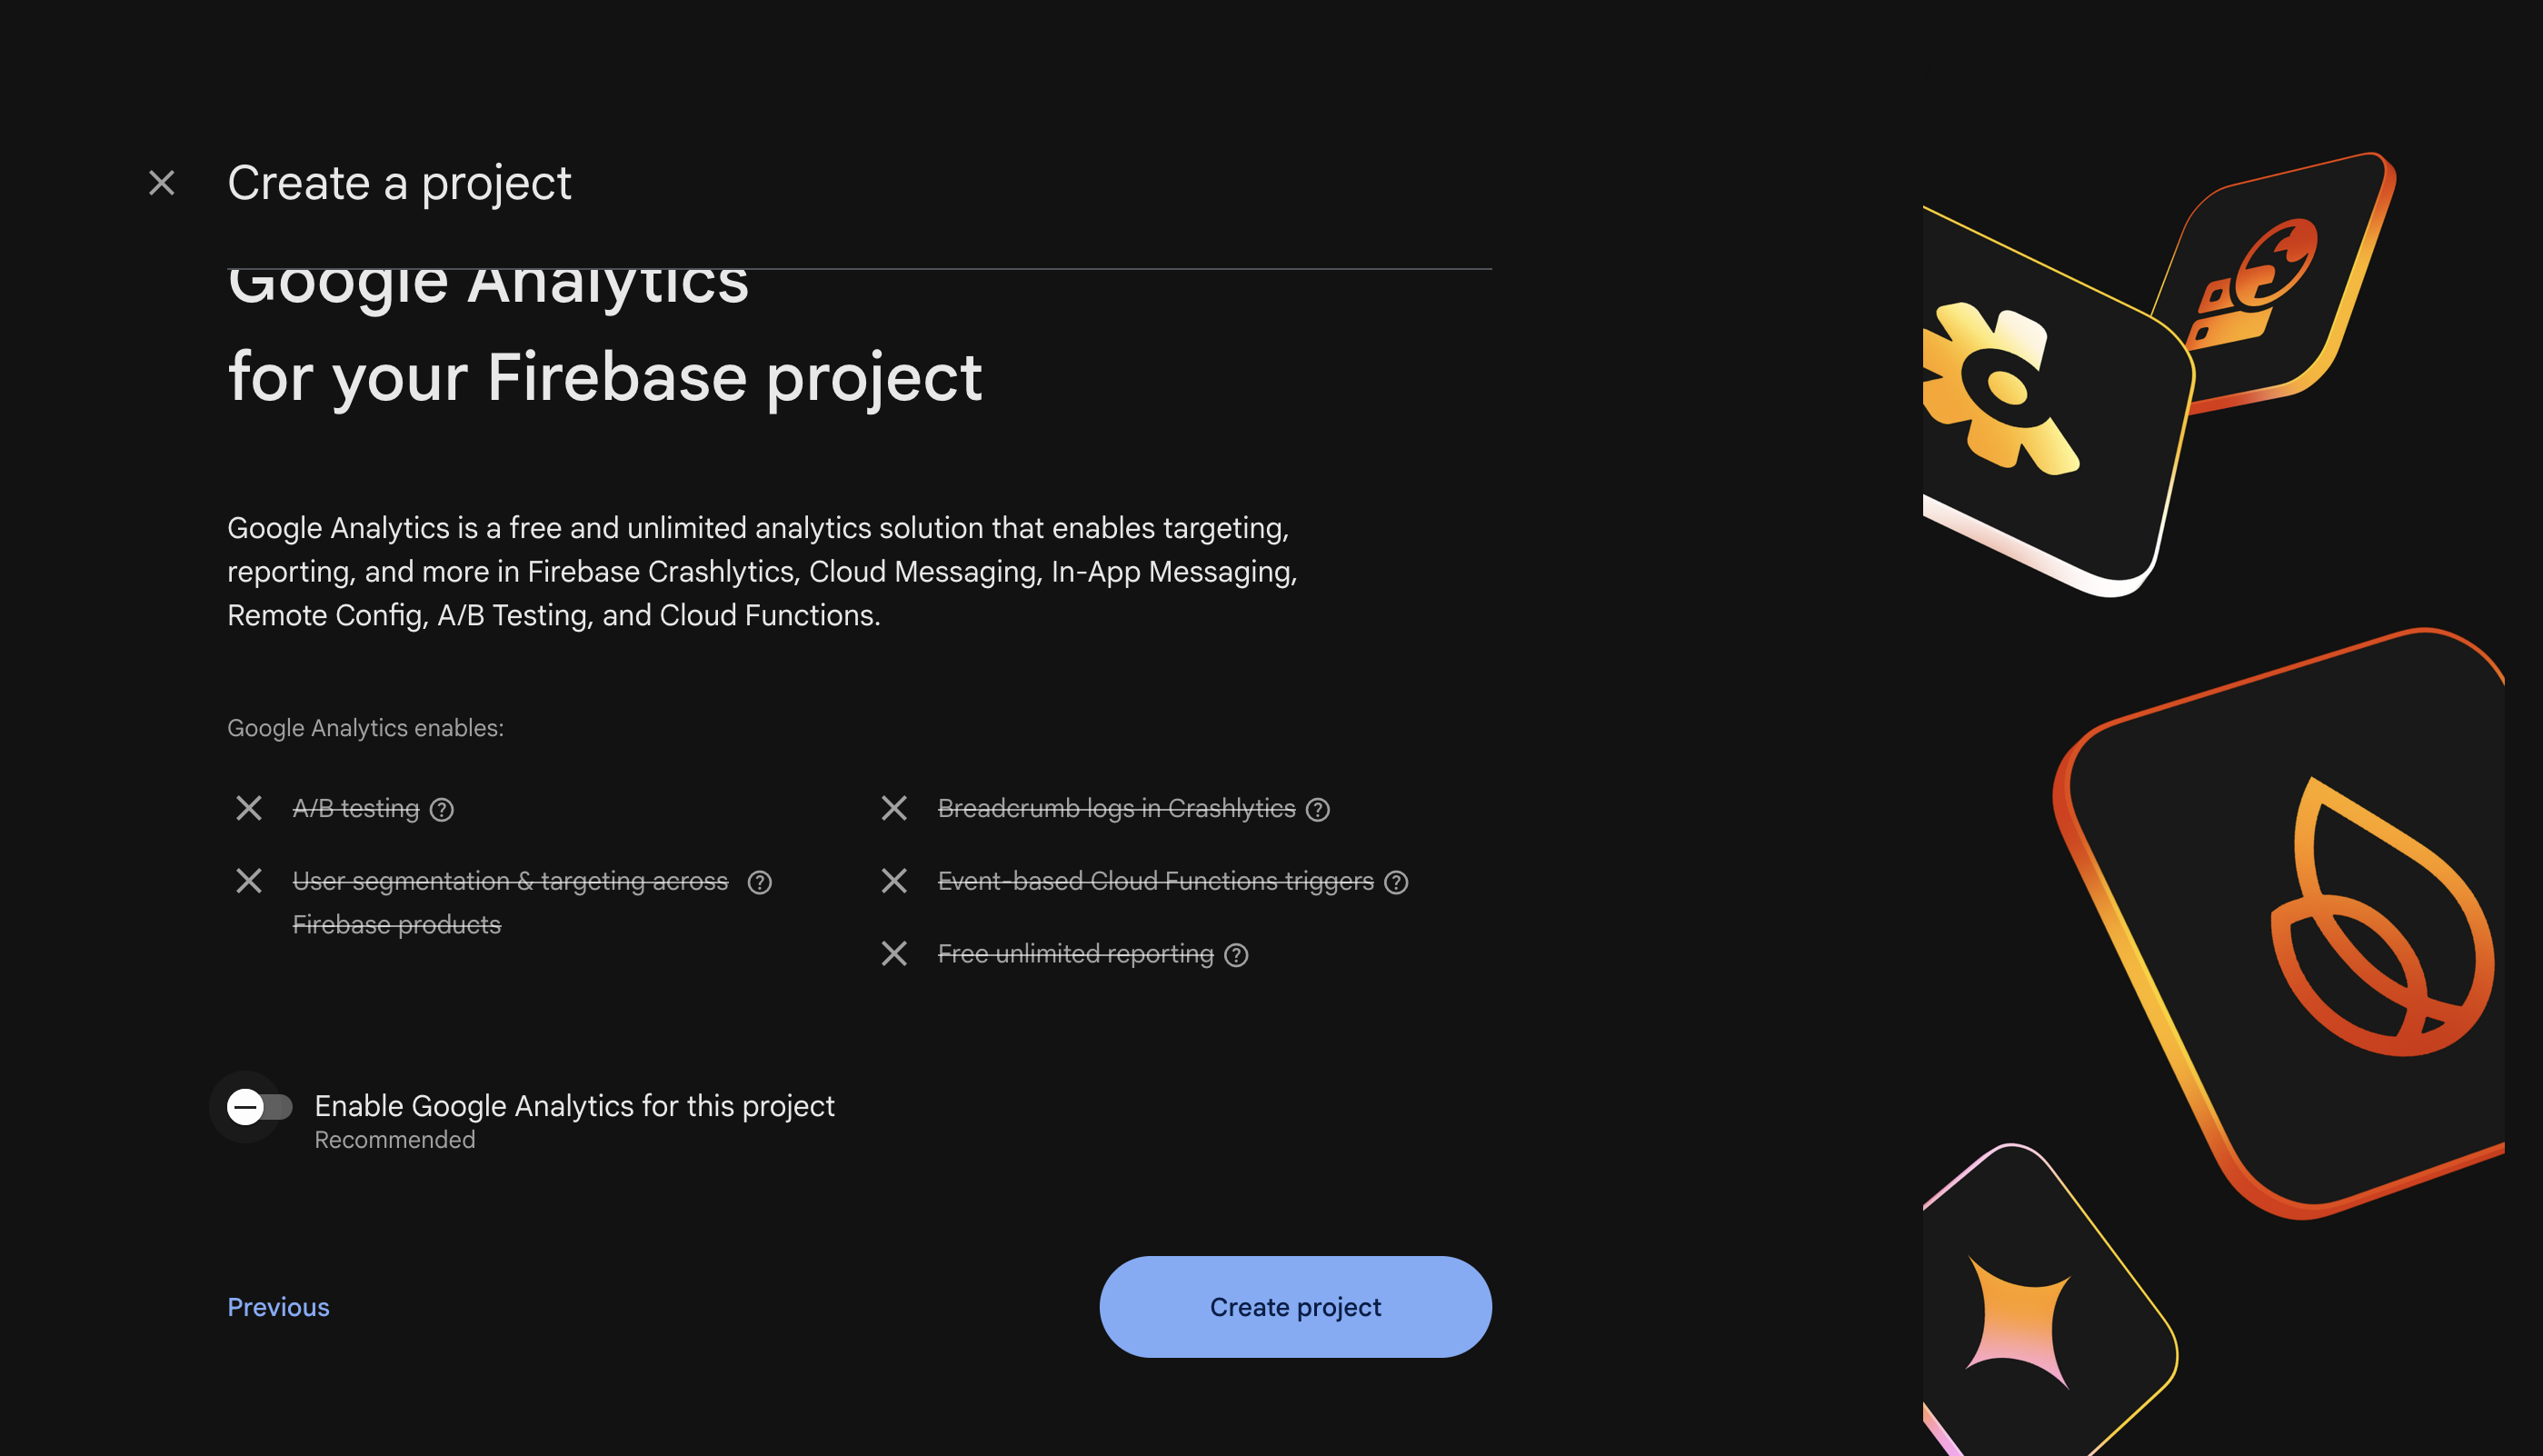
Step 3 — Configure Google Analytics (or skip it)
You can untick Enable Google Analytics for this project — you don't need it for this setup. Click Create project.
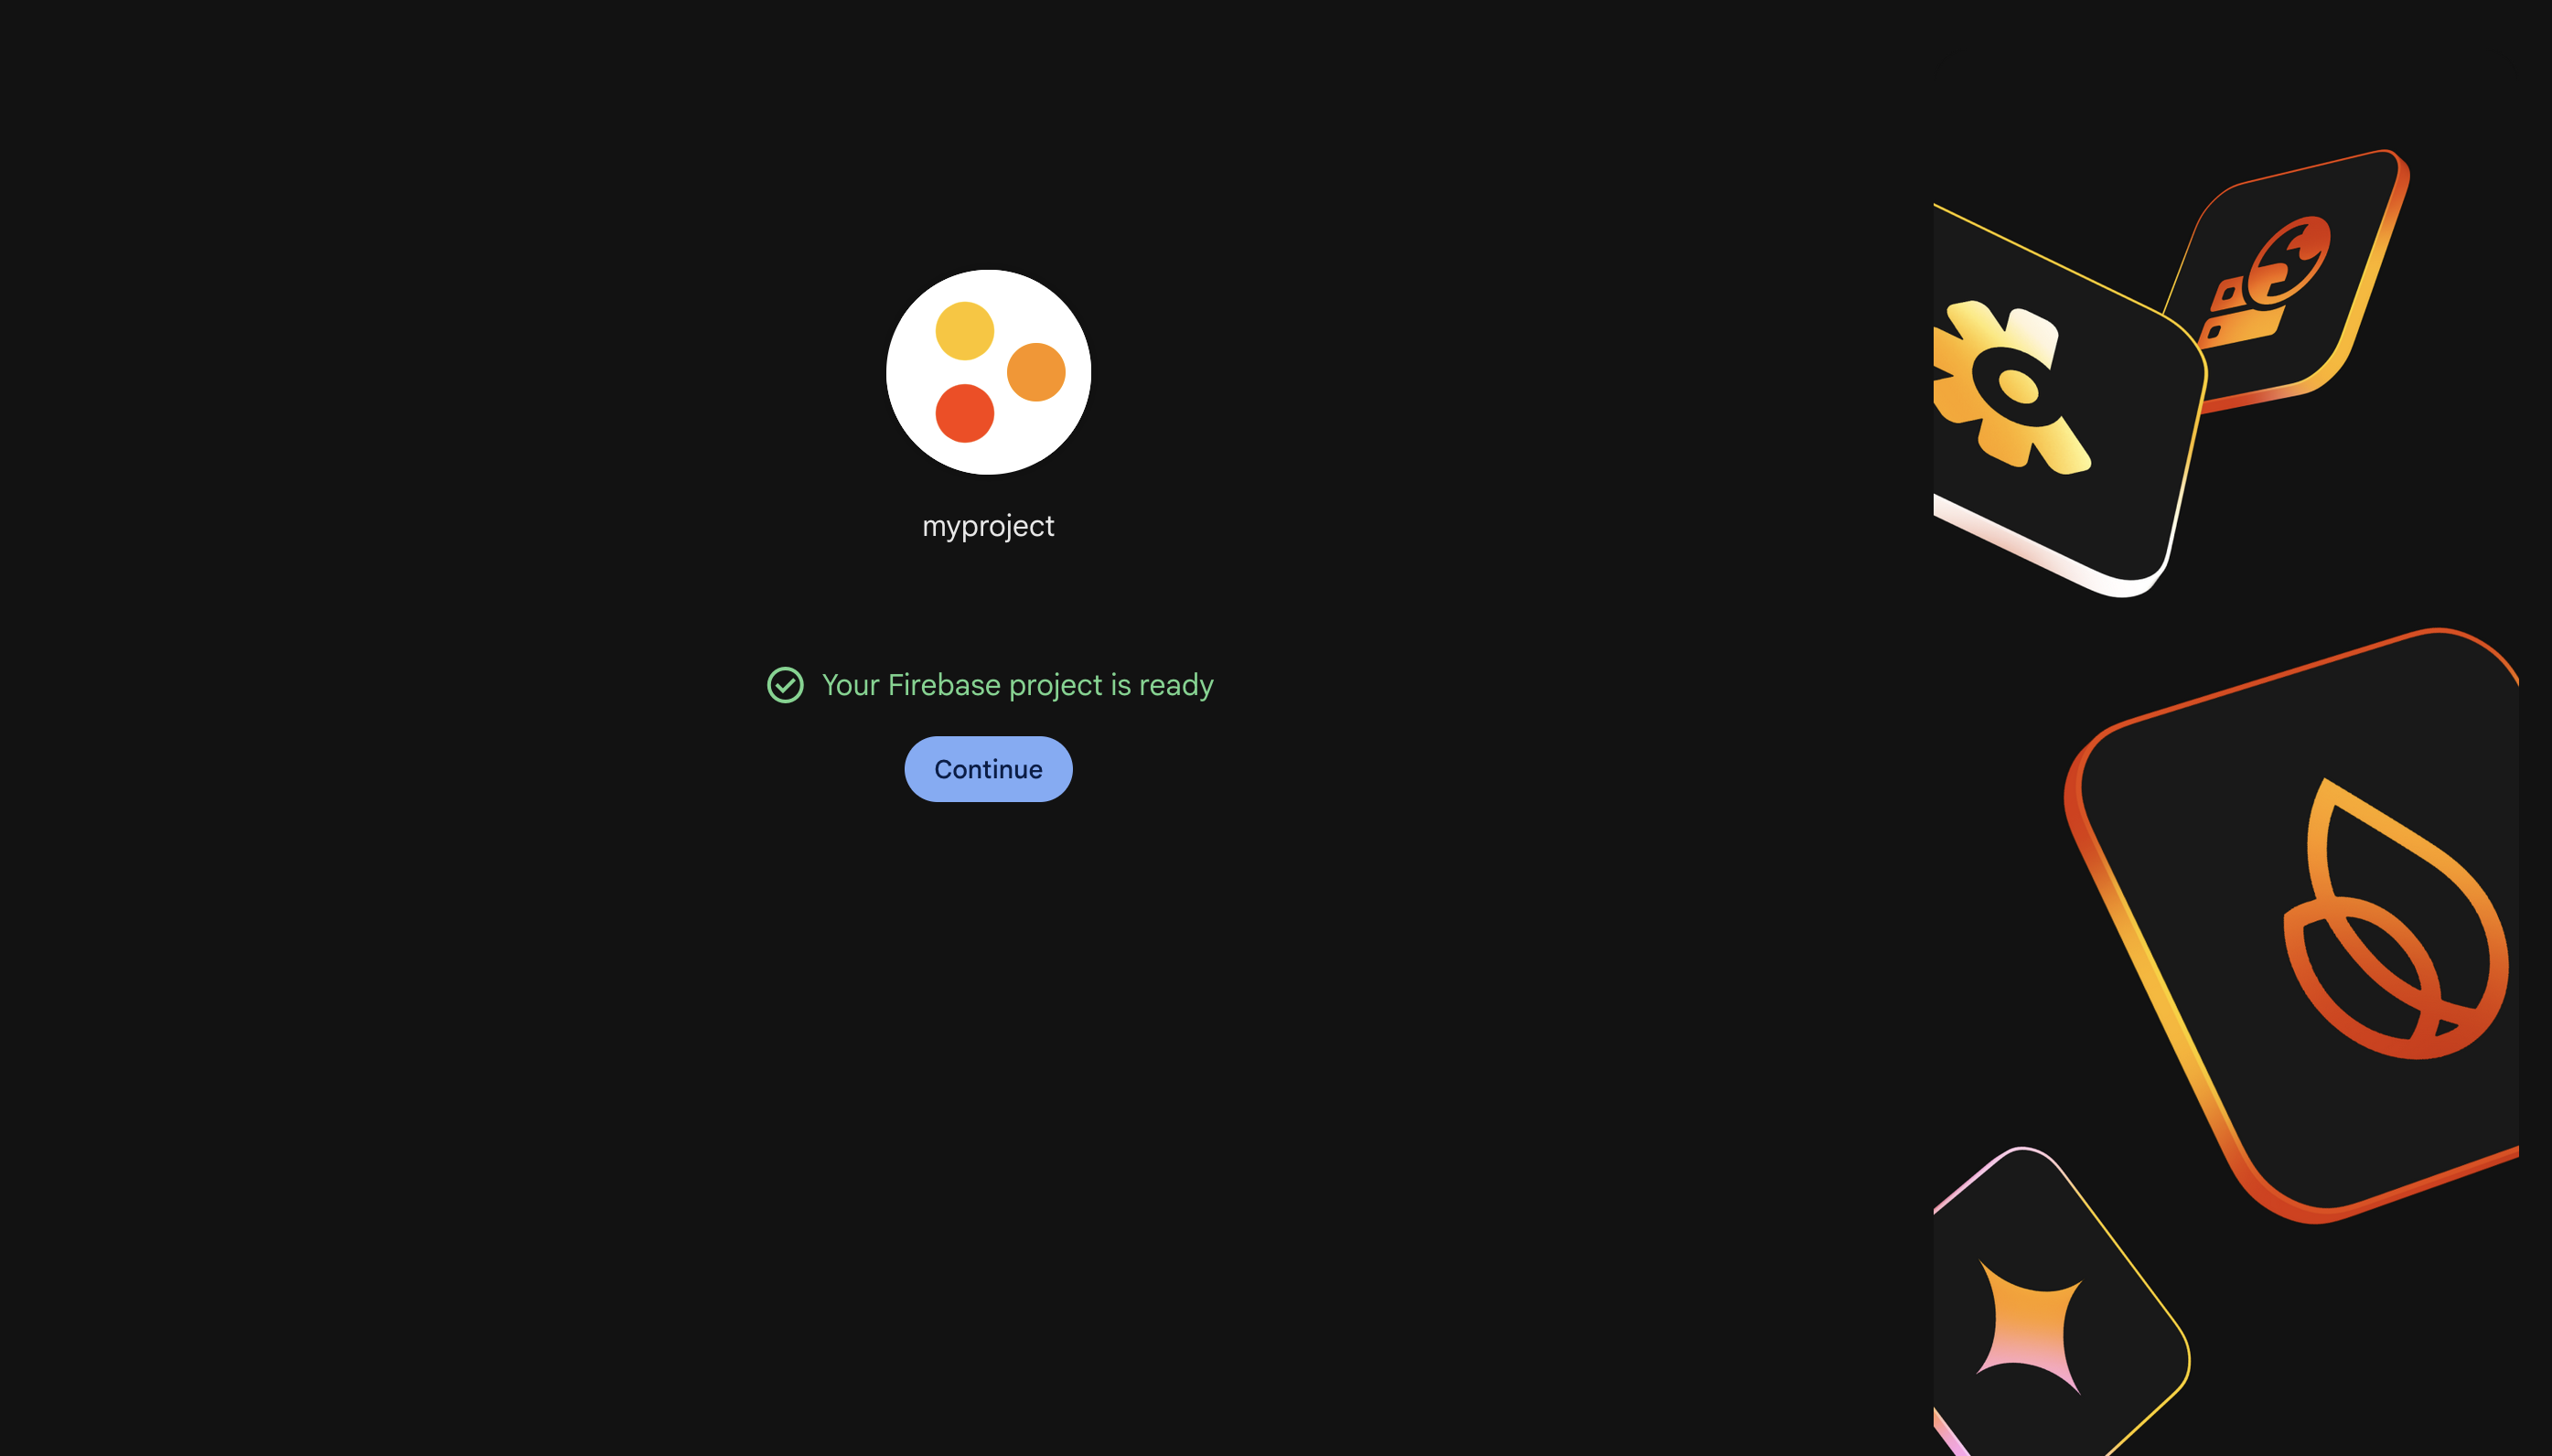
Step 4 — Wait for the project to be provisioned
Once the project is created, you'll see "Your Firebase project is ready". Click Continue.
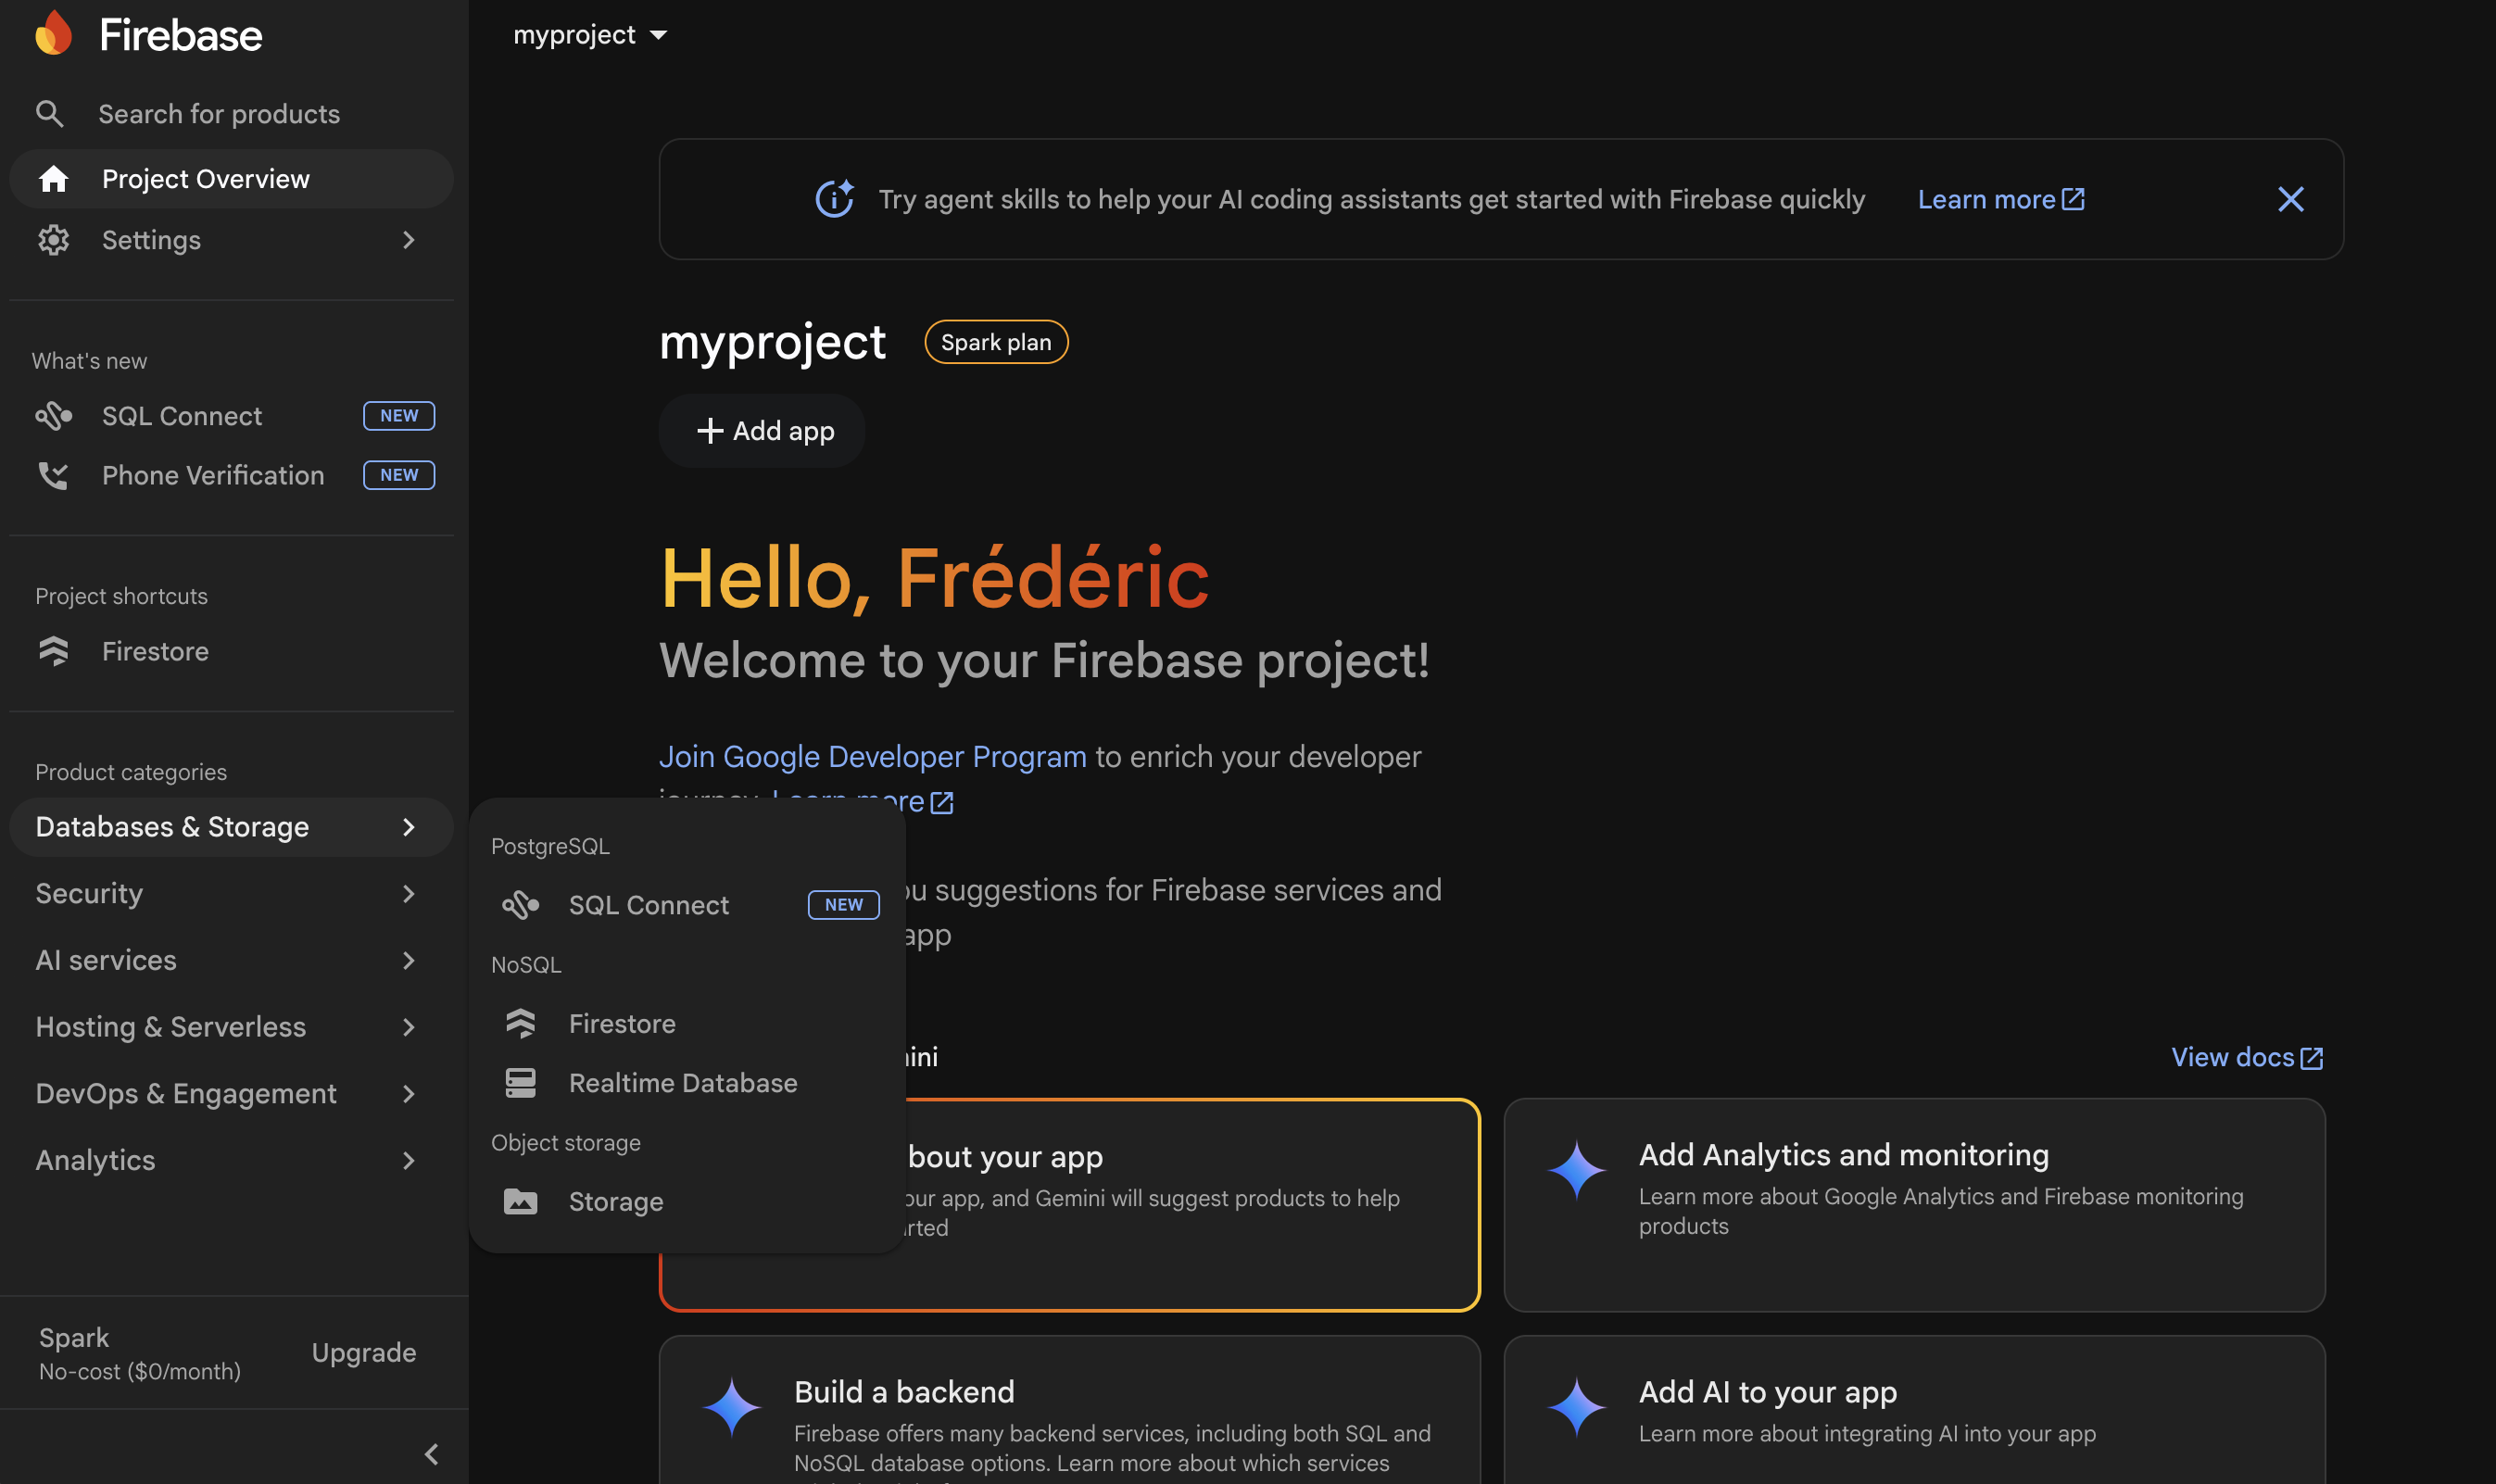
Step 5 — Open the project dashboard
Once your project is created, you'll see it in the right column (here named "myproject"). Click on it to open the dashboard.
Step 6 — Open Firestore Database
Once on your project dashboard, in the right sidebar select Databases & Storage → Firestore.
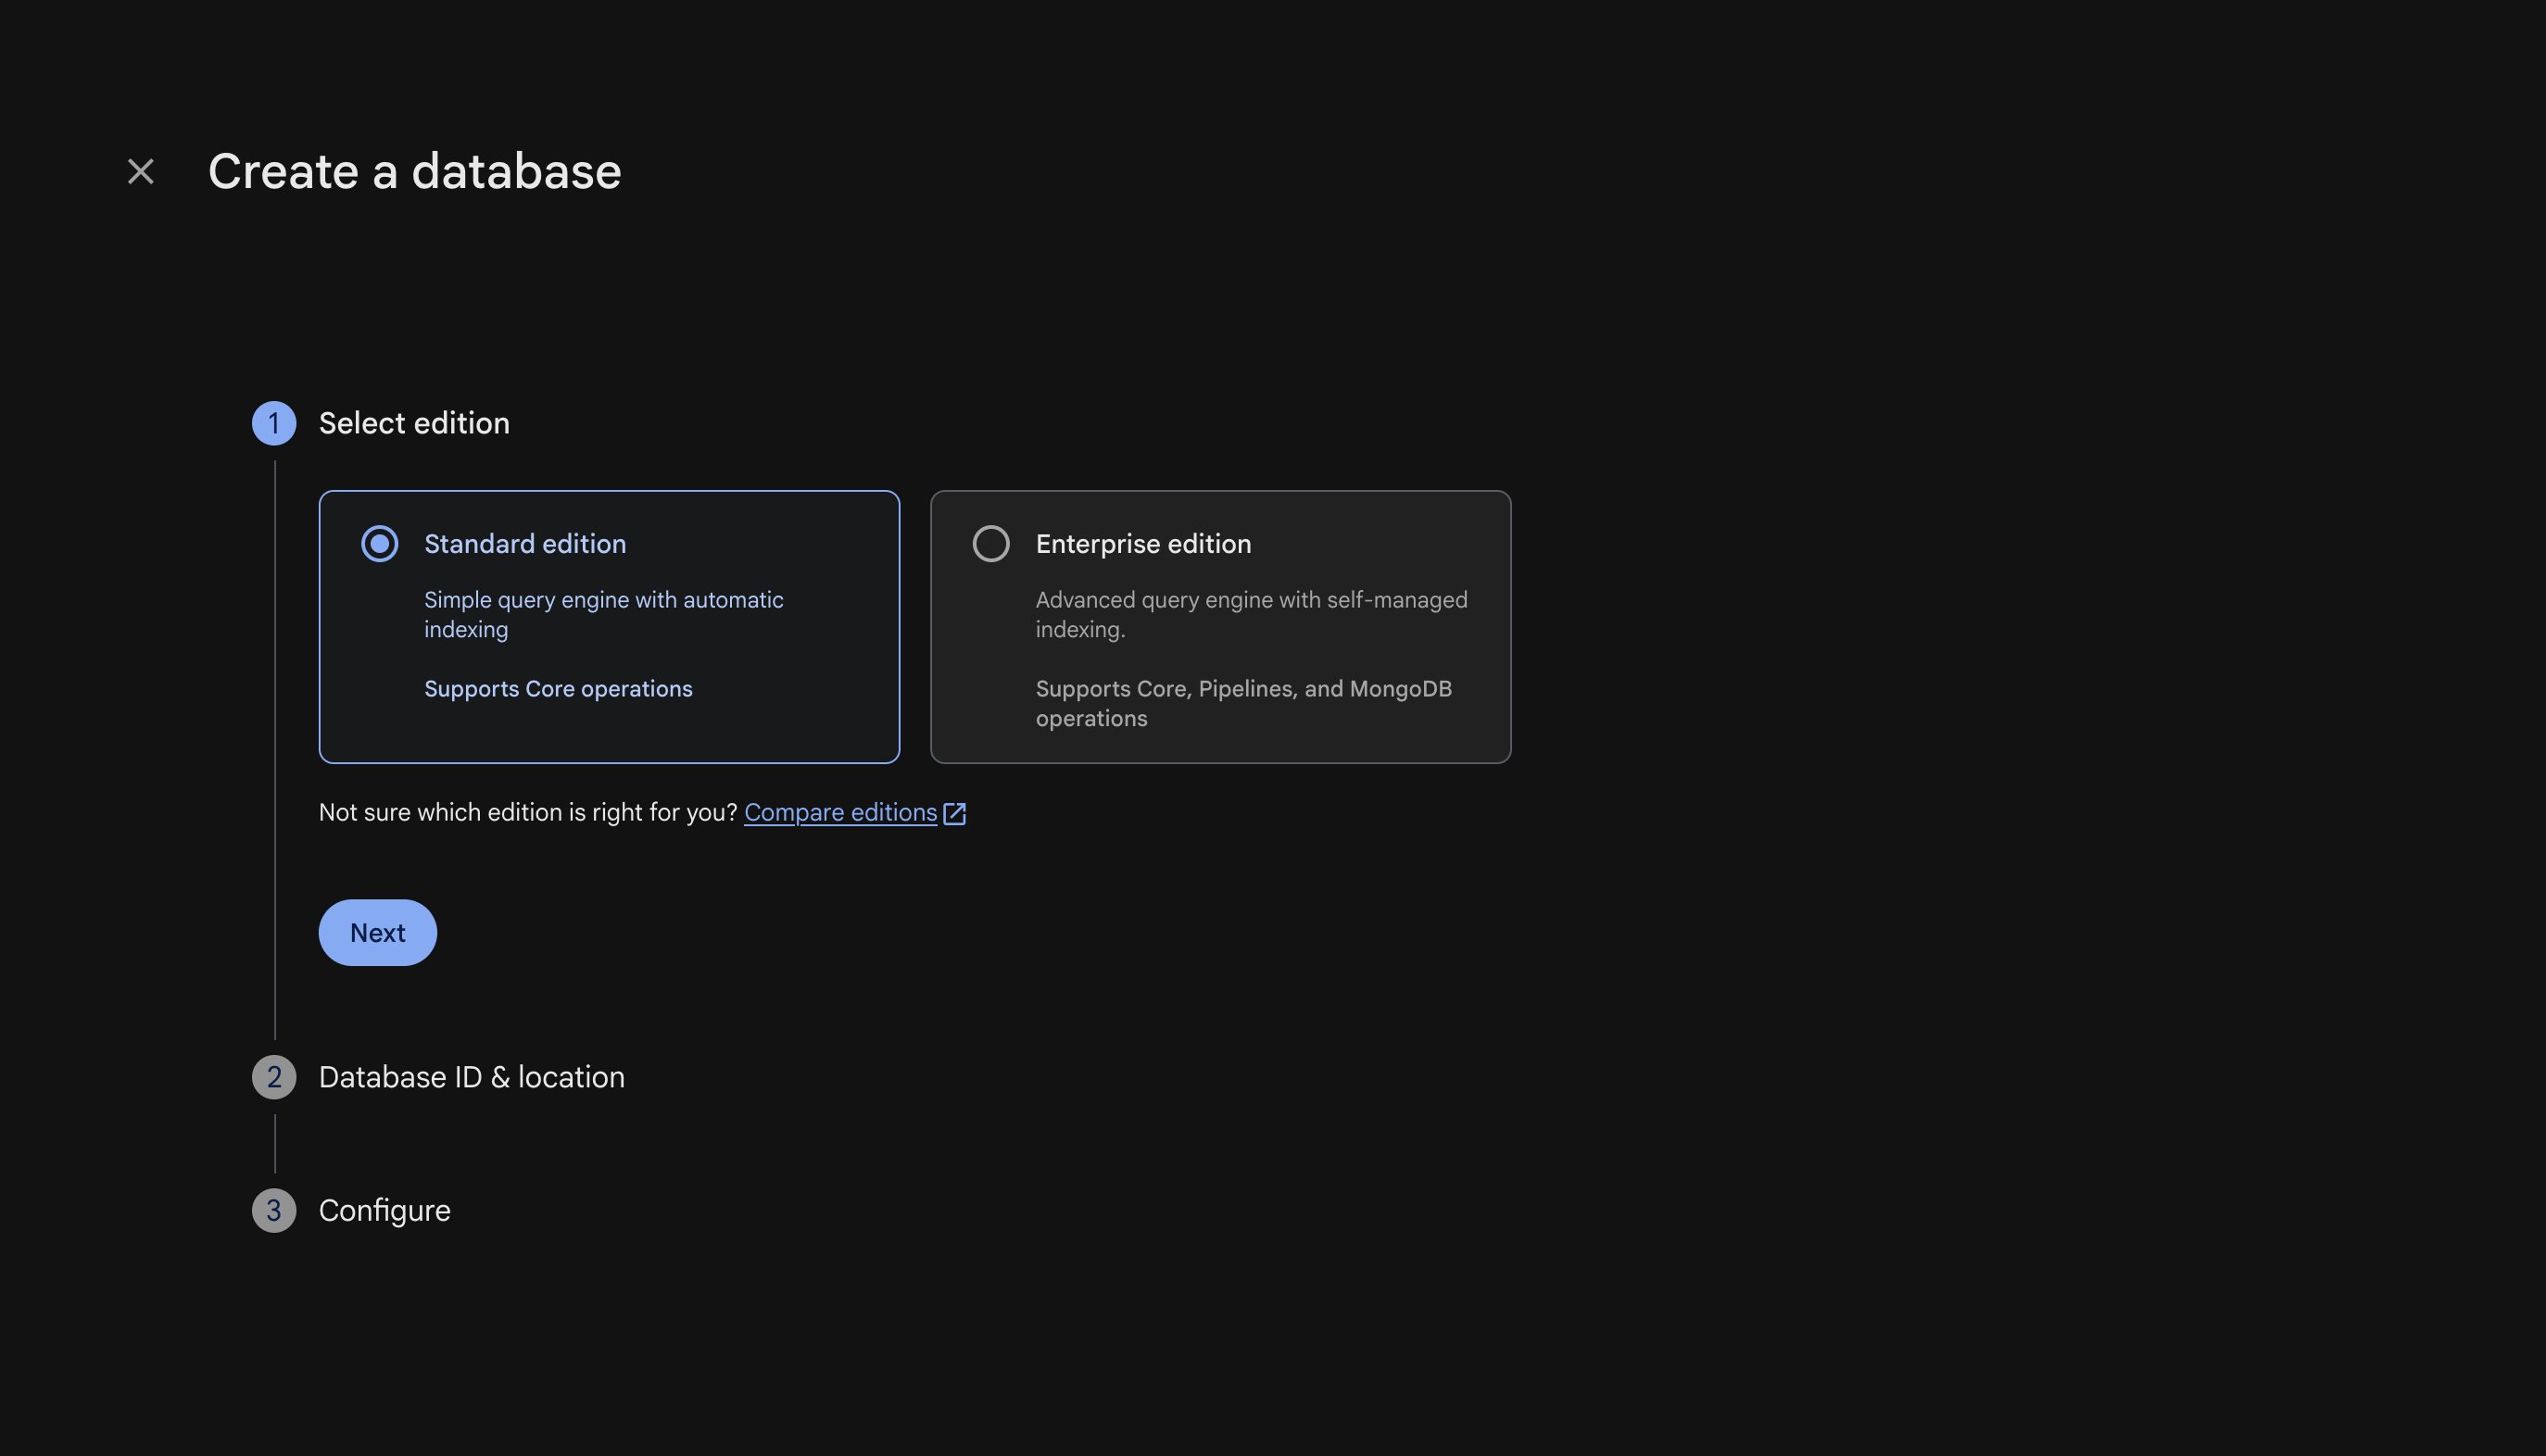
Step 7 — Create the database (1/4)
Click Create database.

Step 8 — Create the database (2/4)
You can leave the Database ID field empty. Select Standard Edition, then click Next.
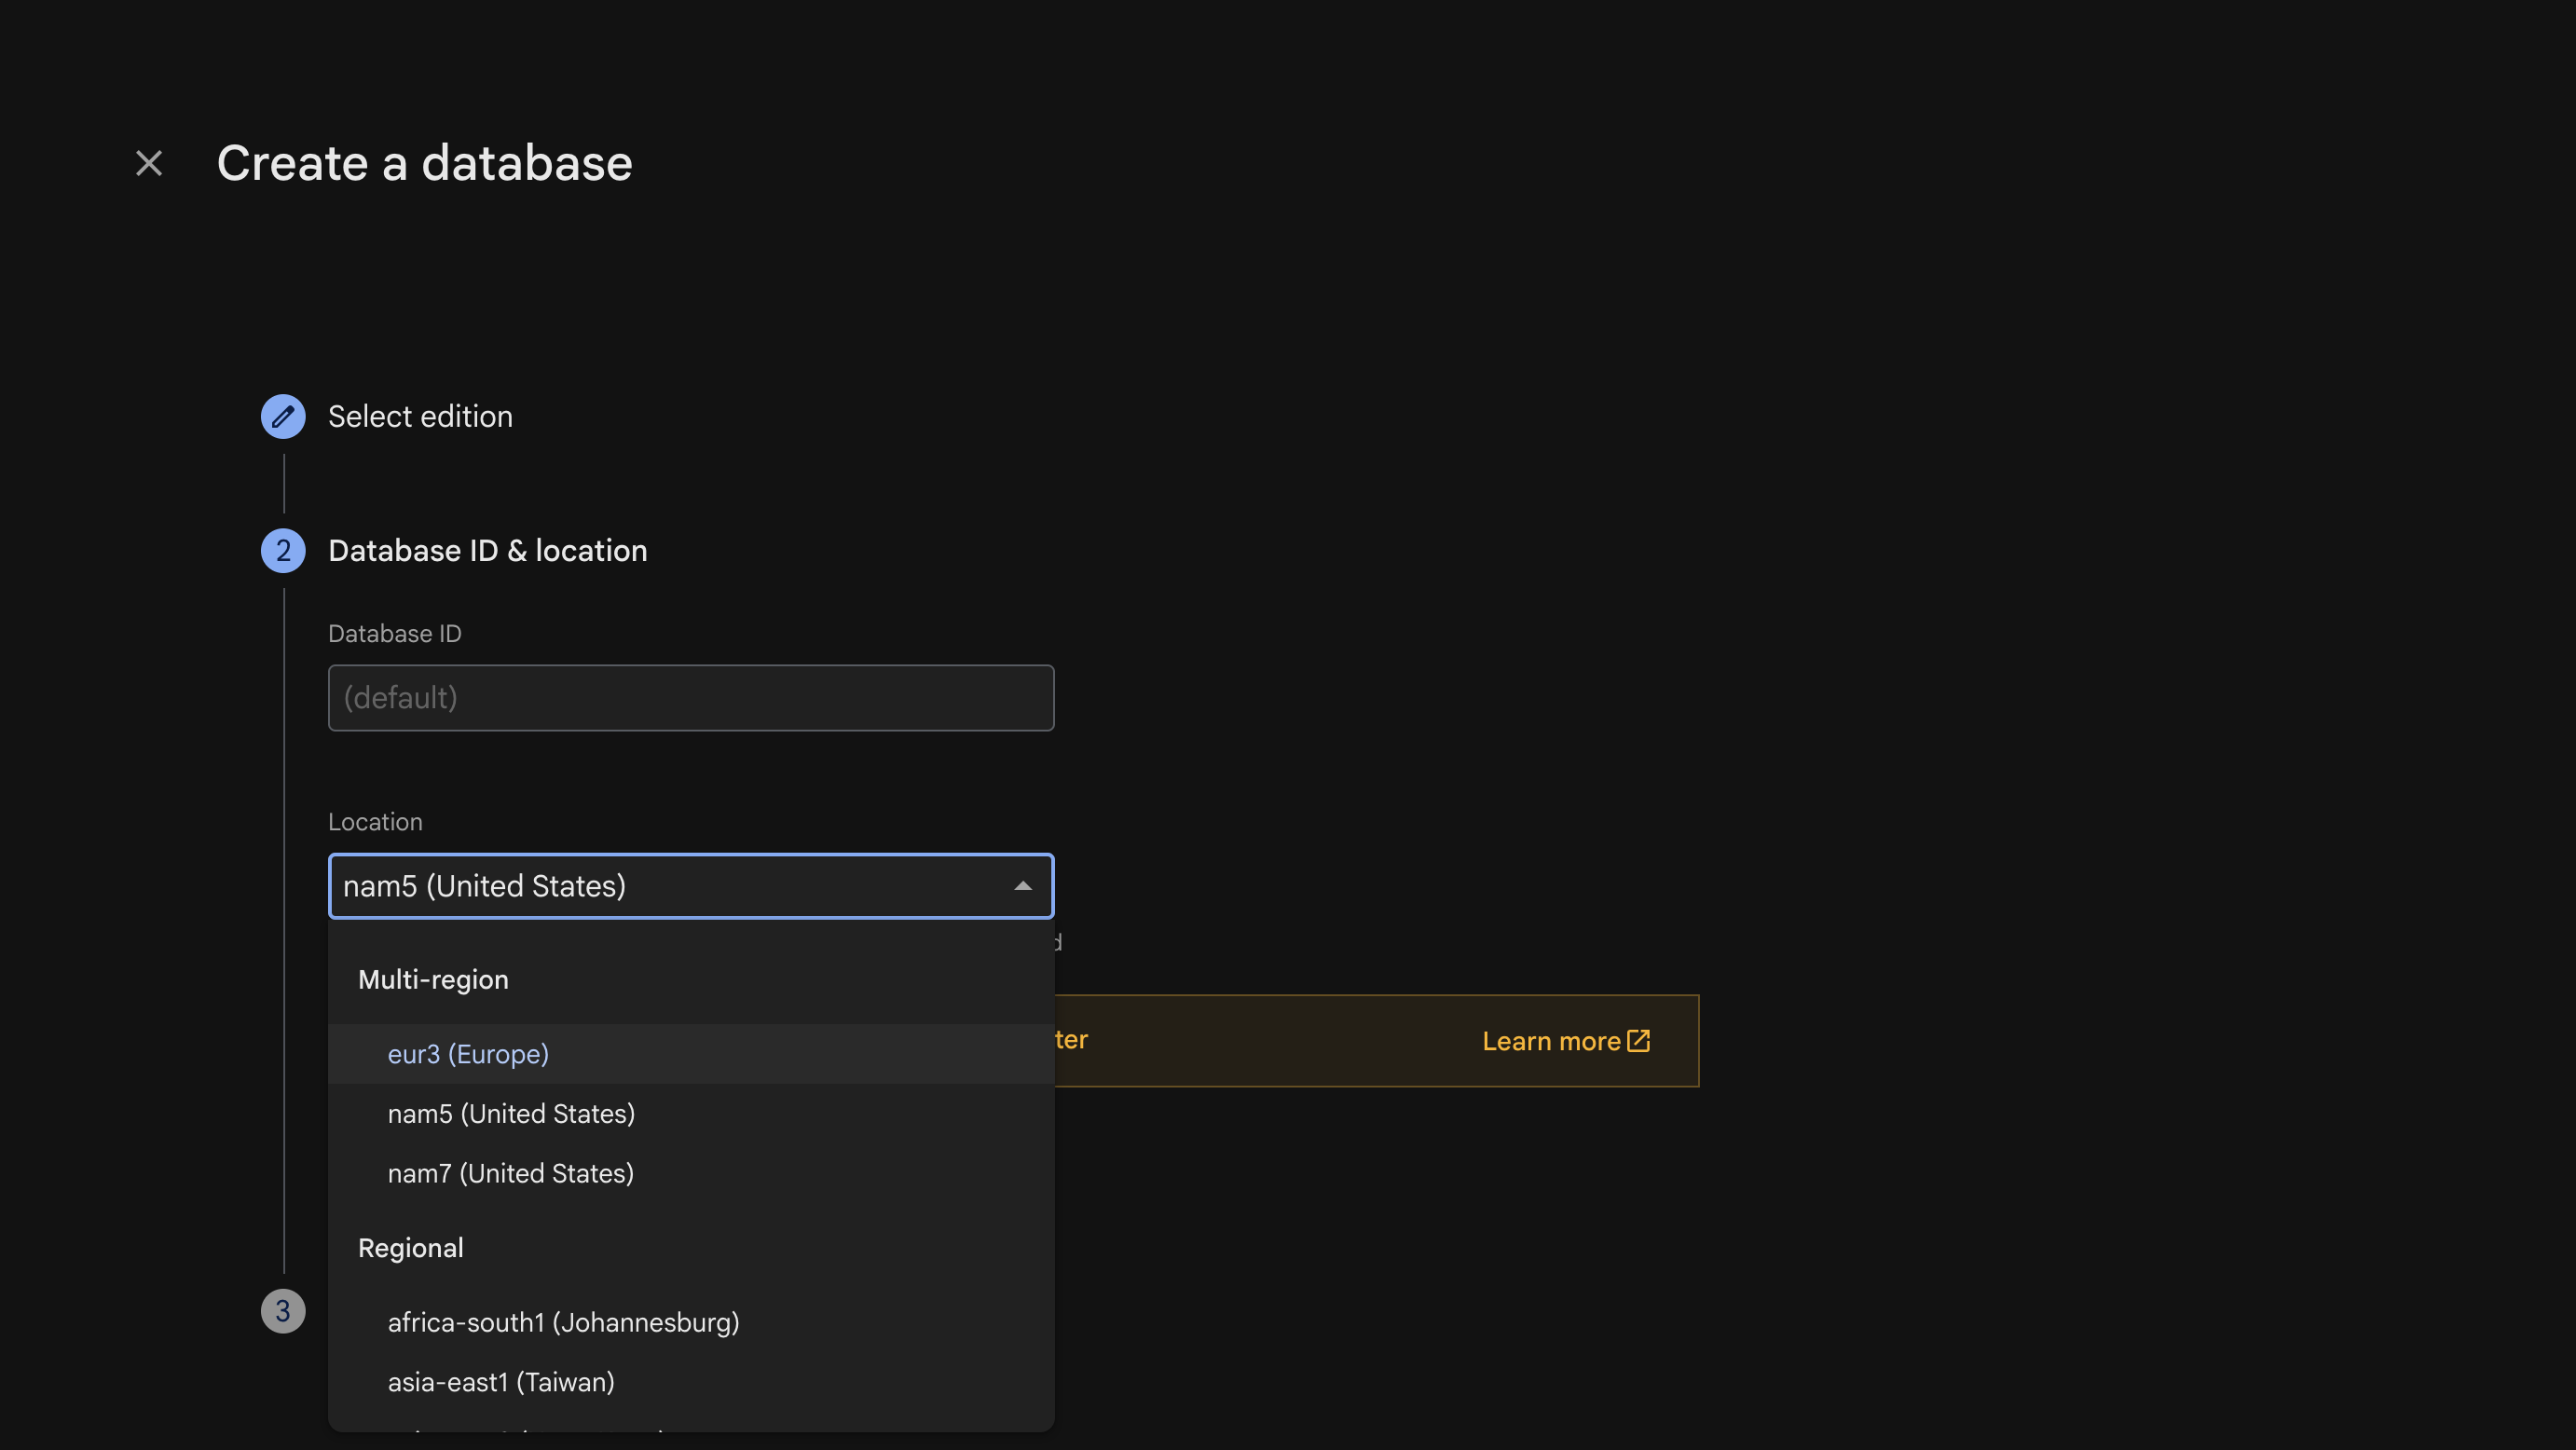
Step 9 — Create the database (3/4)
Select the region for your database, then click Next.
Pick the region closest to most of your users — moving the database afterwards requires a manual migration.
Step 10 — Create the database (4/4)
Select Start in production mode, then click Create.
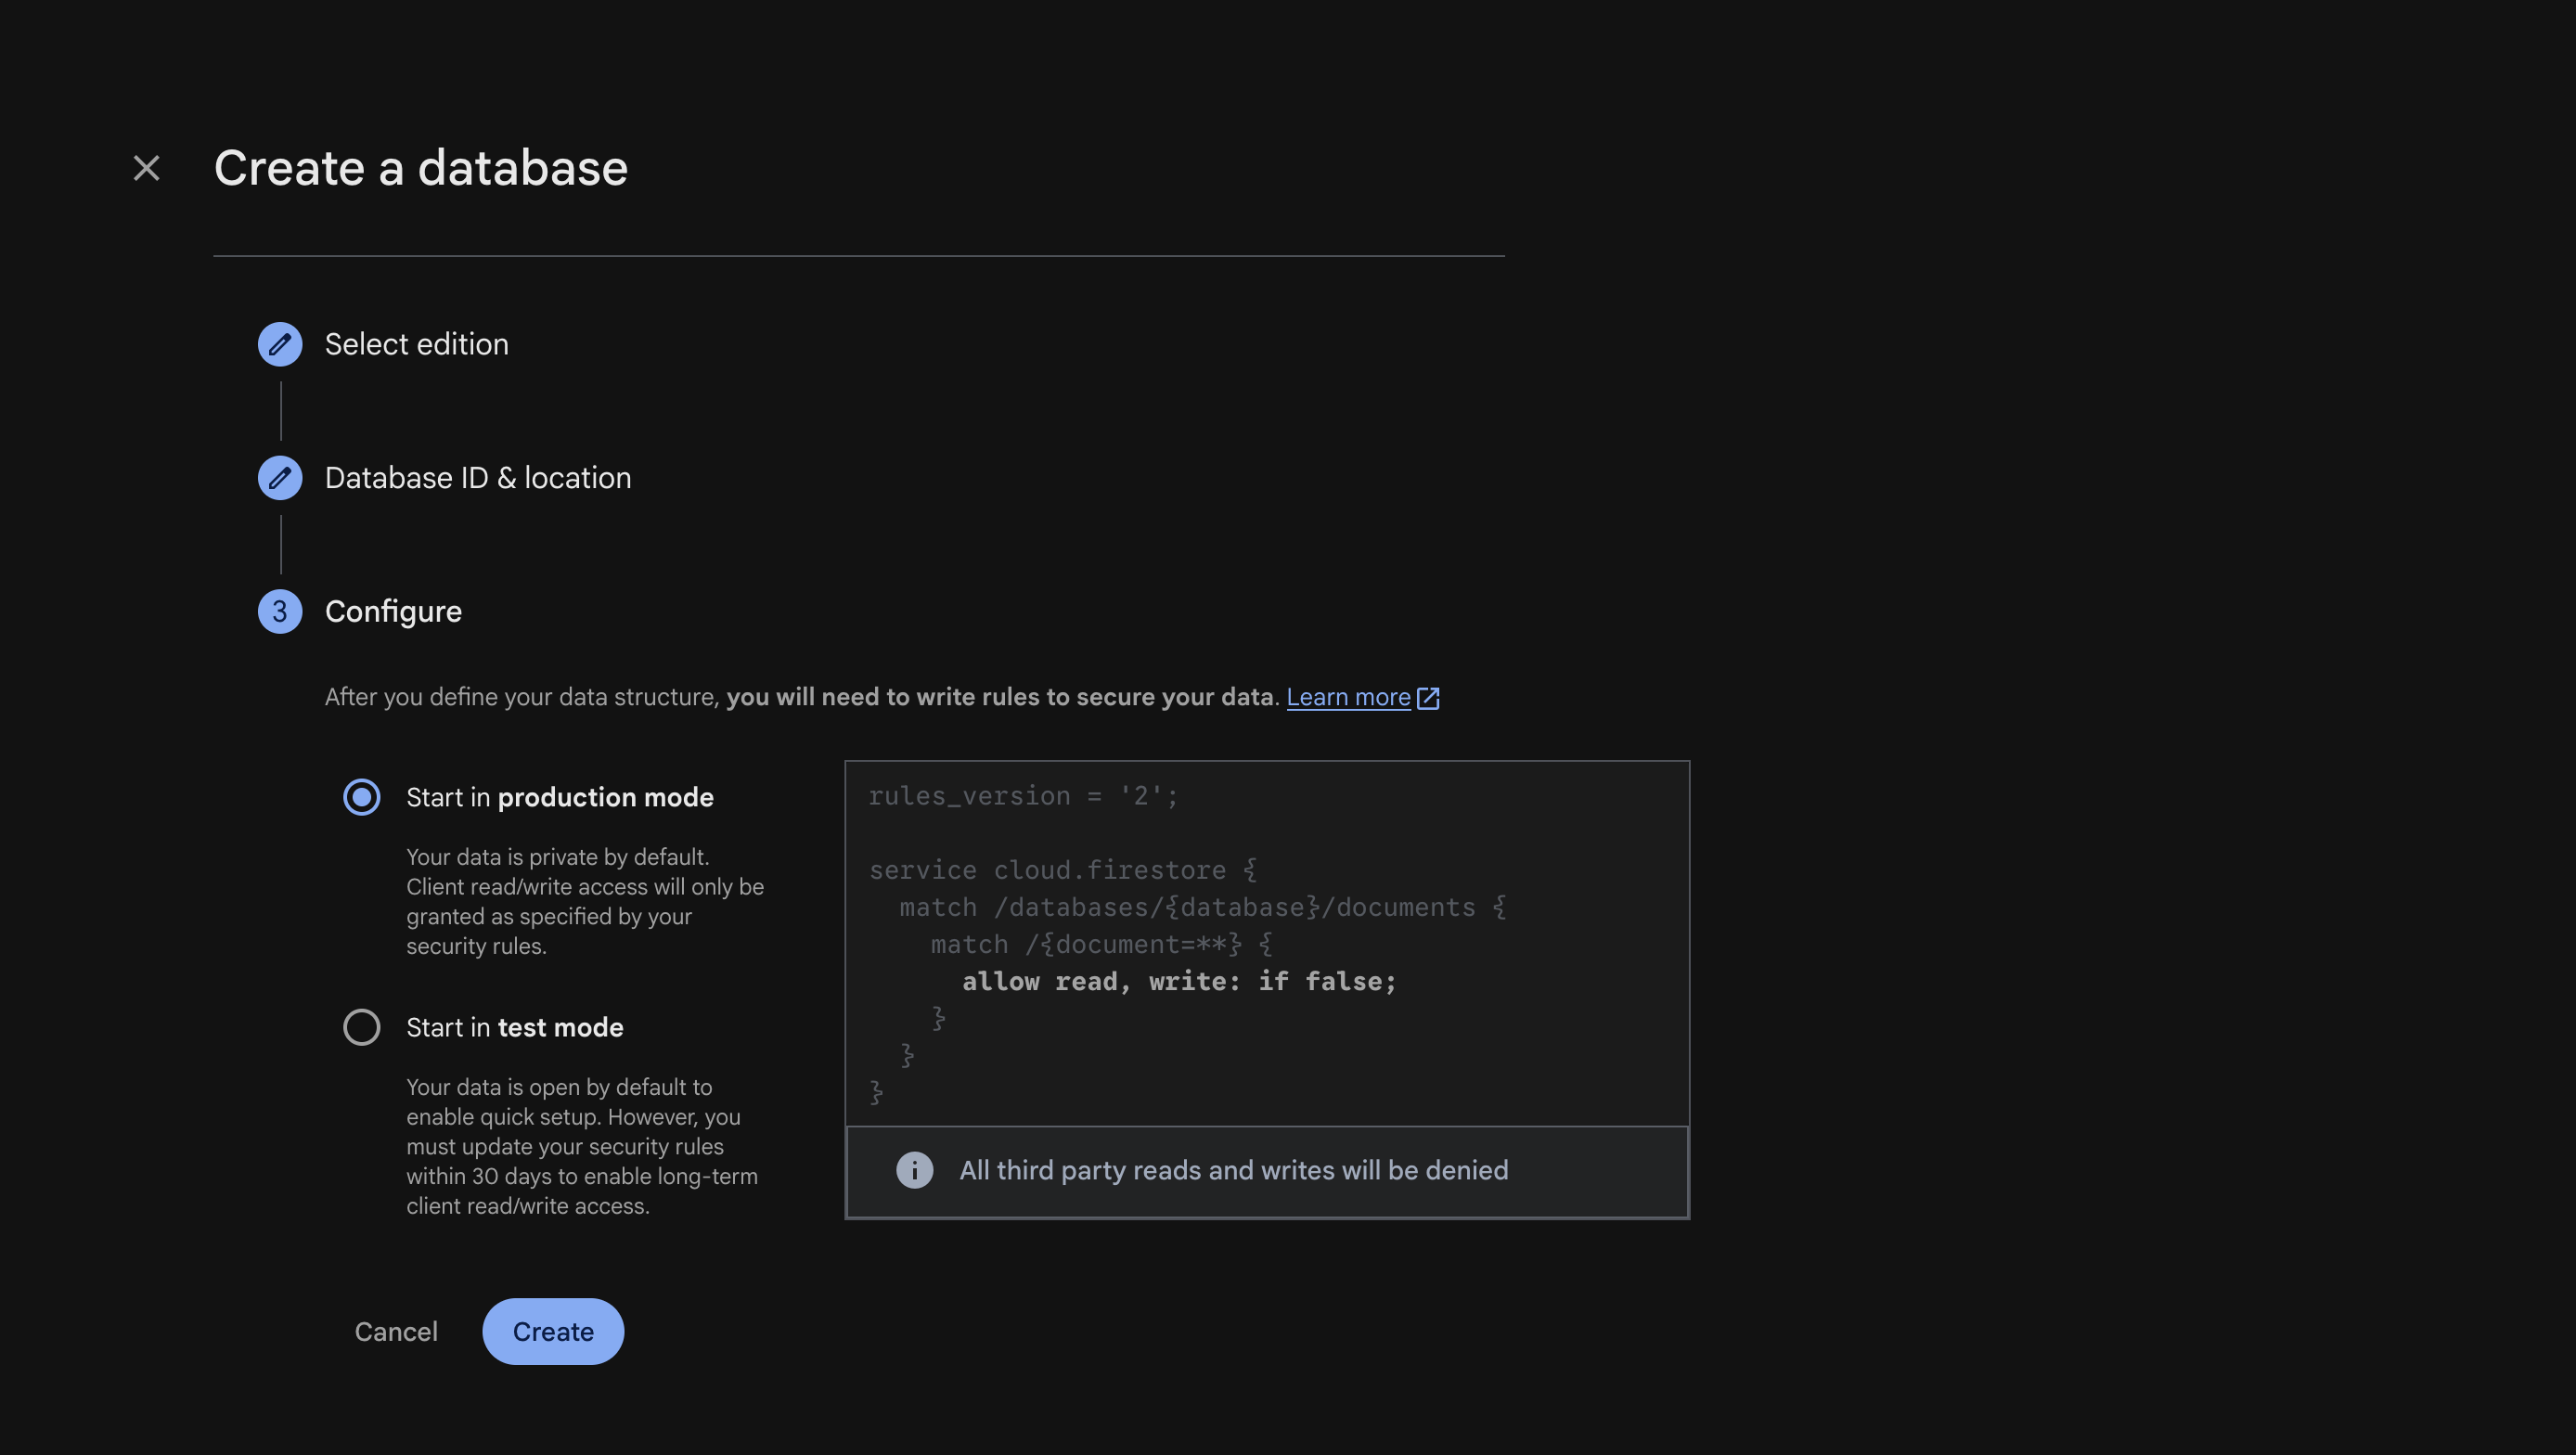
Firestore is schemaless — you don't create any collections by hand at this point. The application you're deploying creates the necessary collections automatically the first time it's used. For now, leaving the database empty is normal.
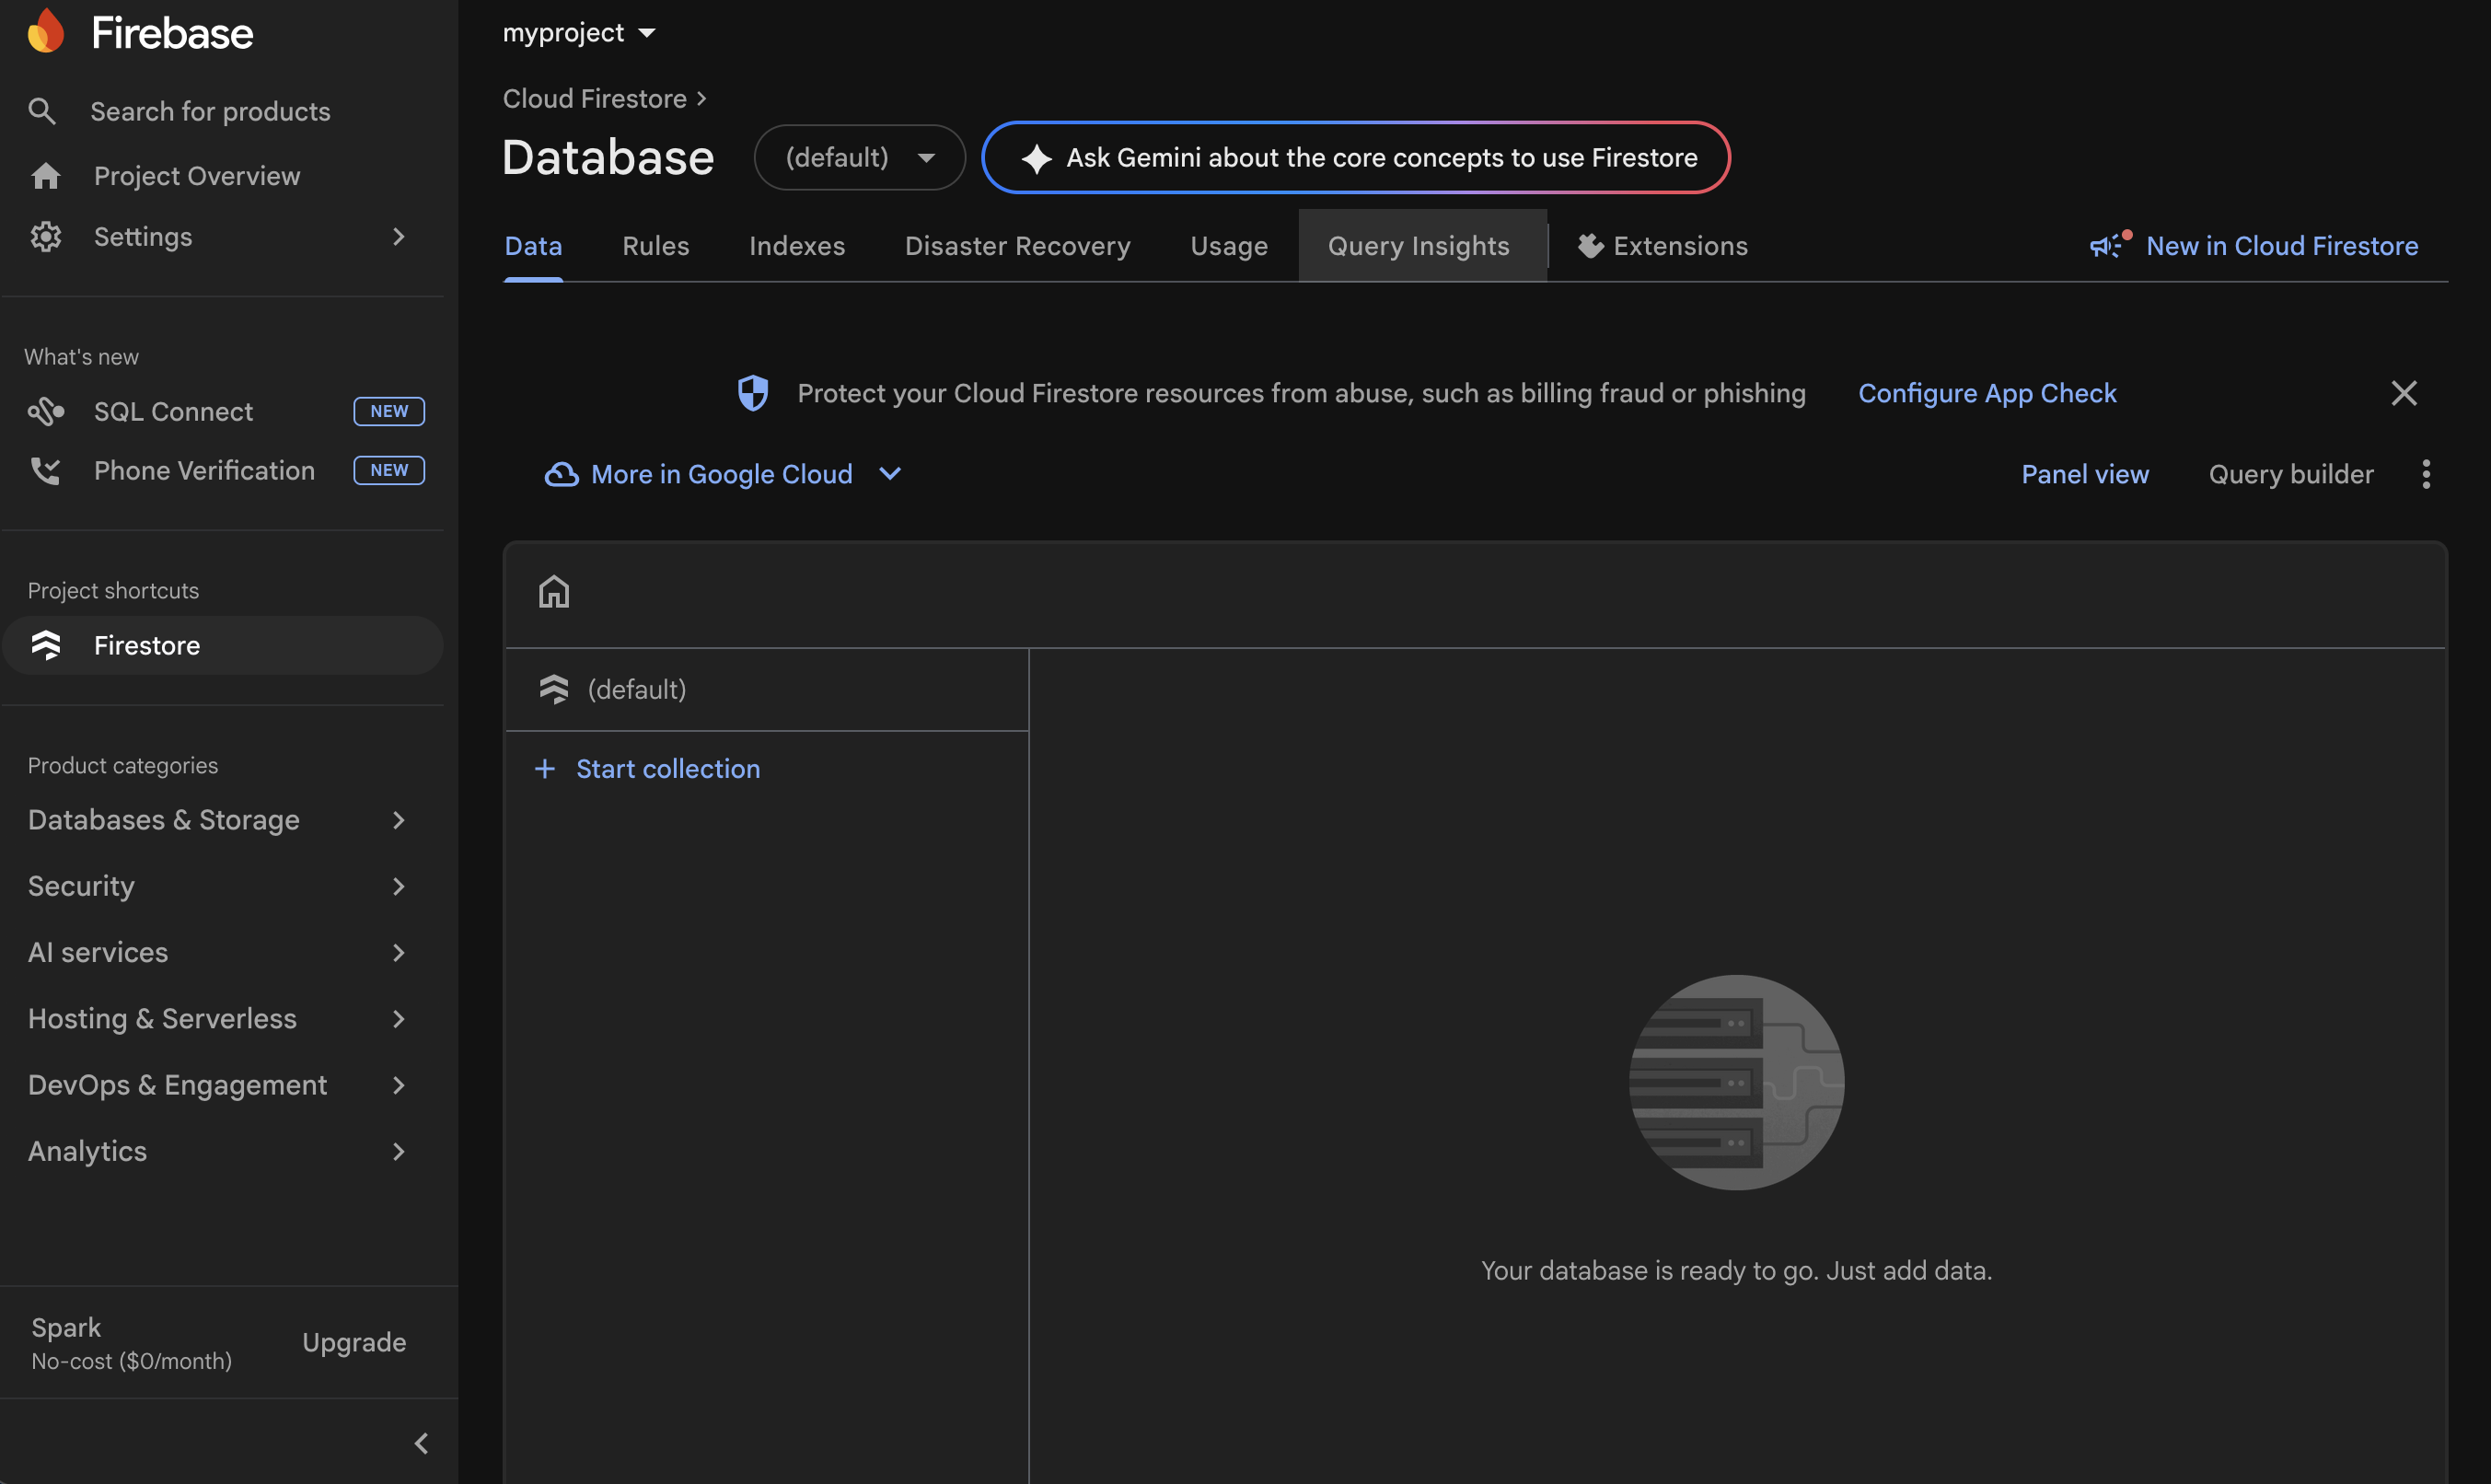
Step 11 — Database dashboard
Once your database is created, you'll be redirected to its dashboard view.
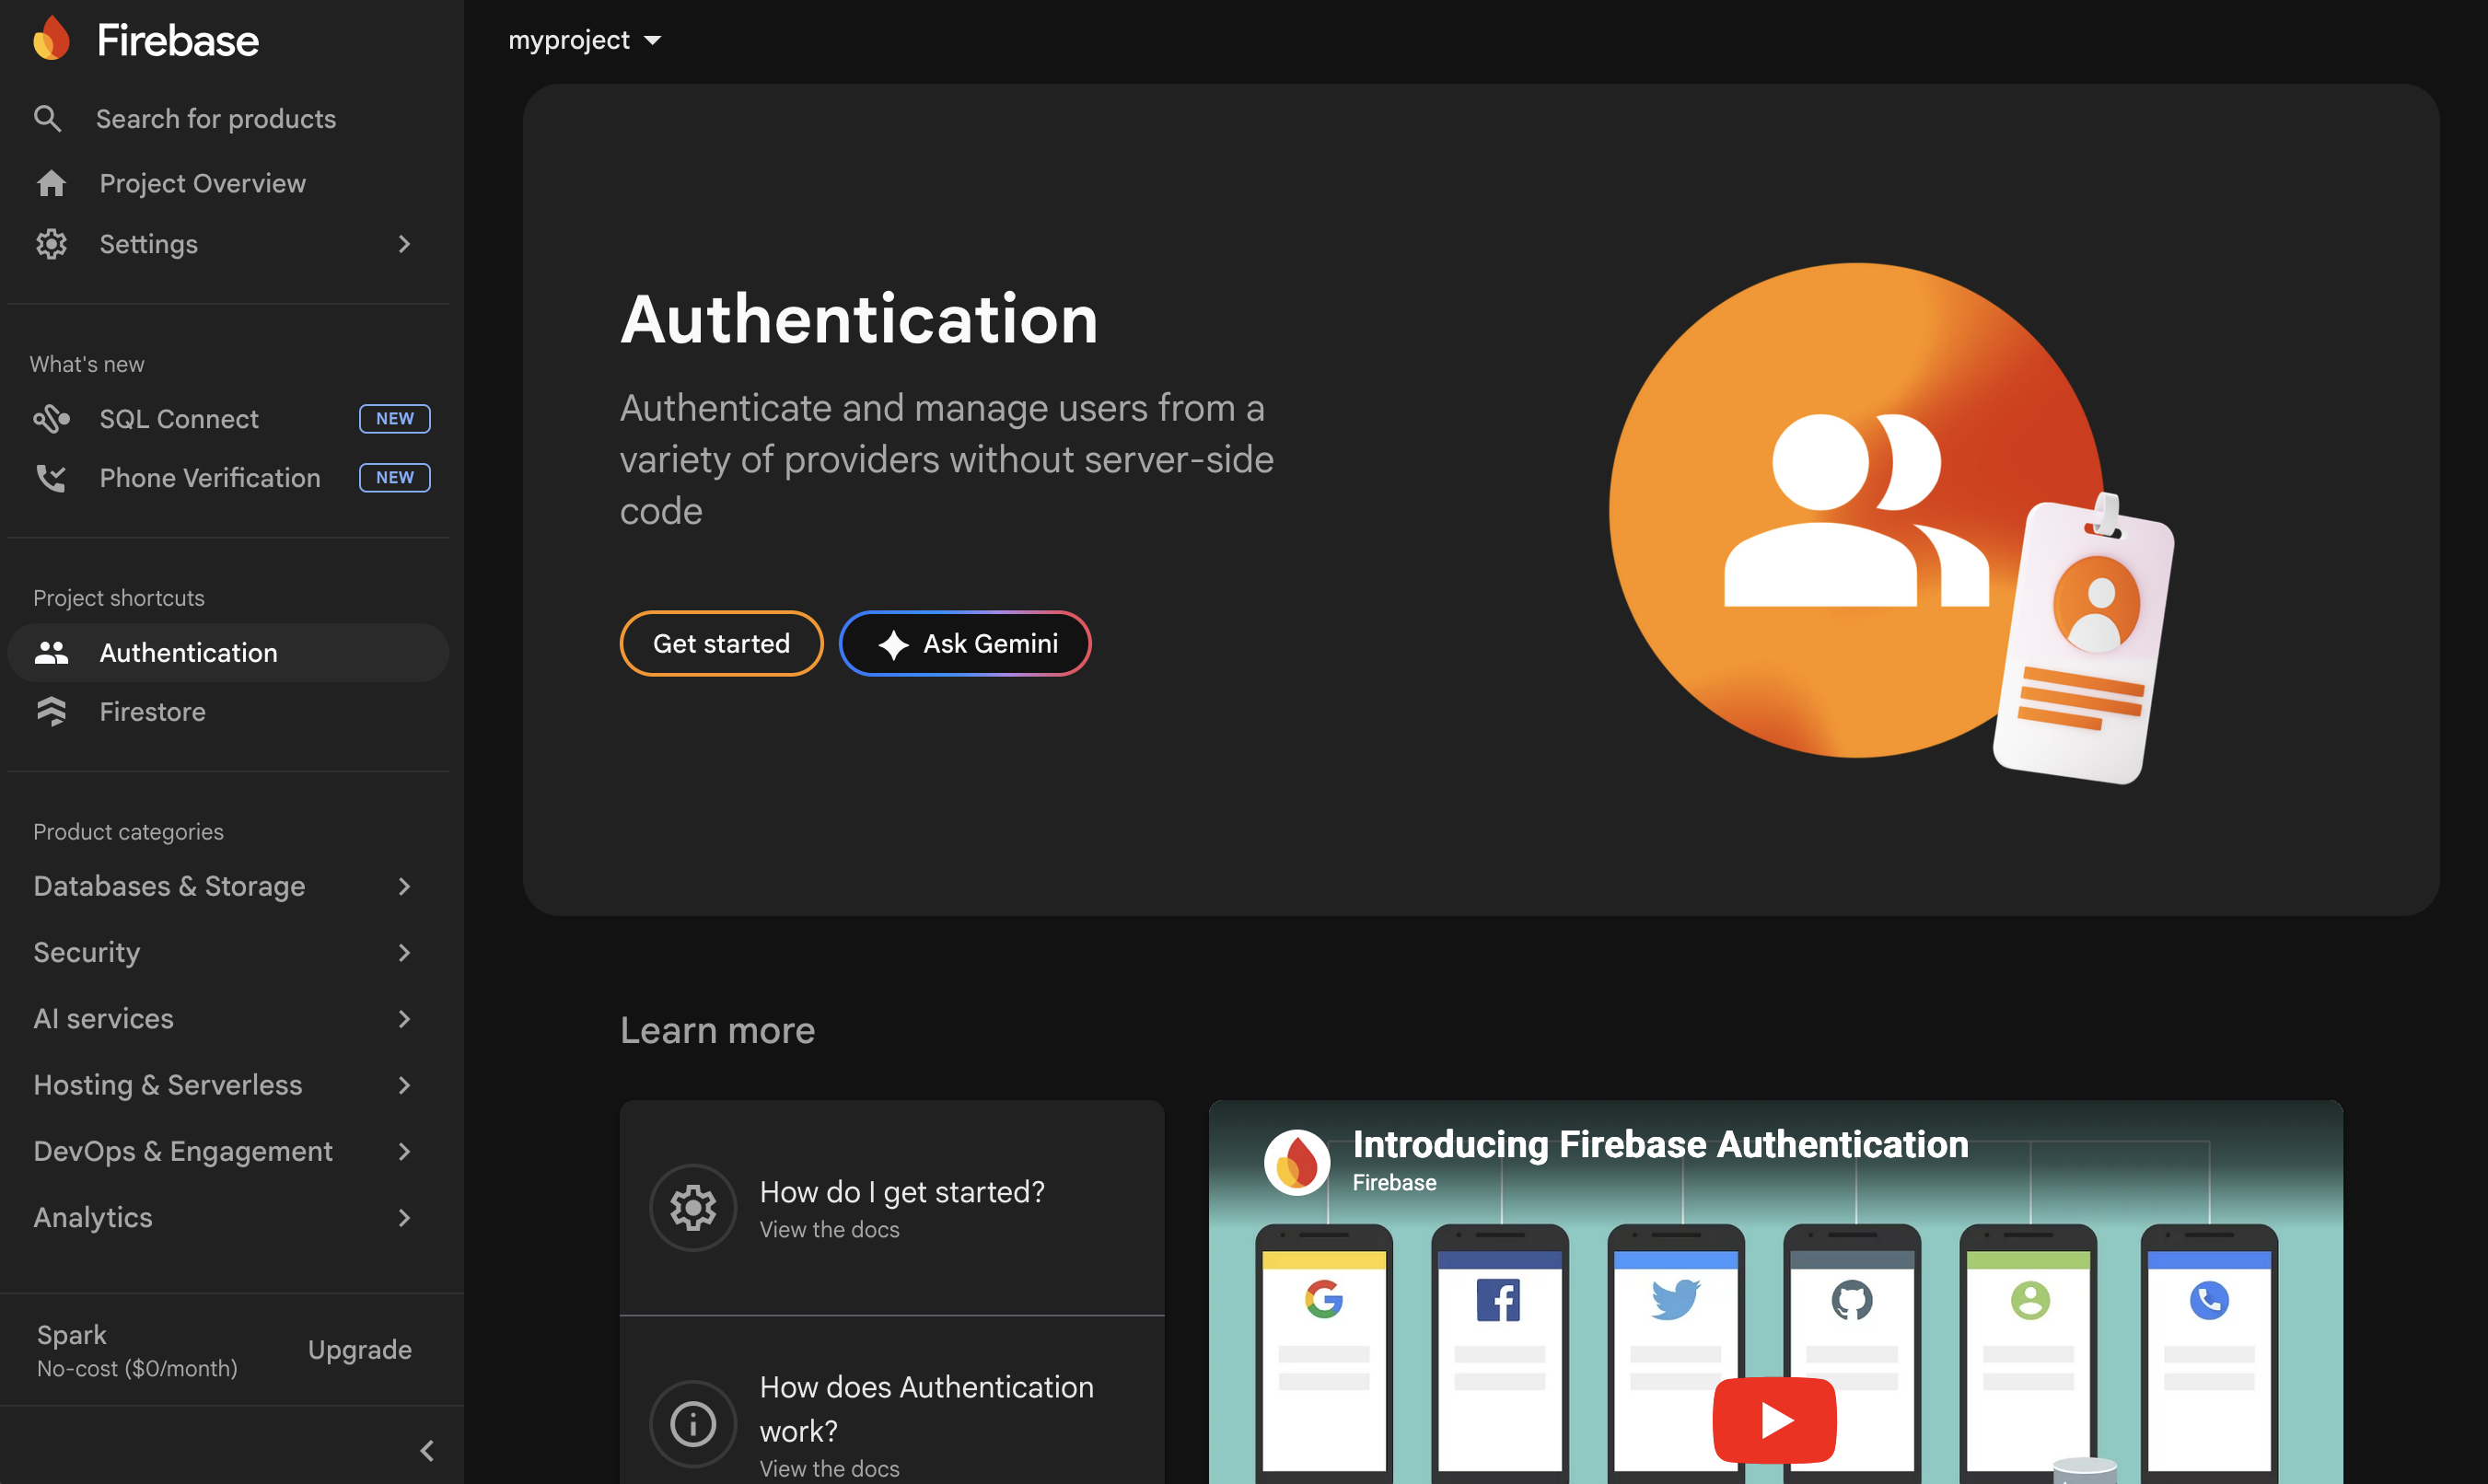
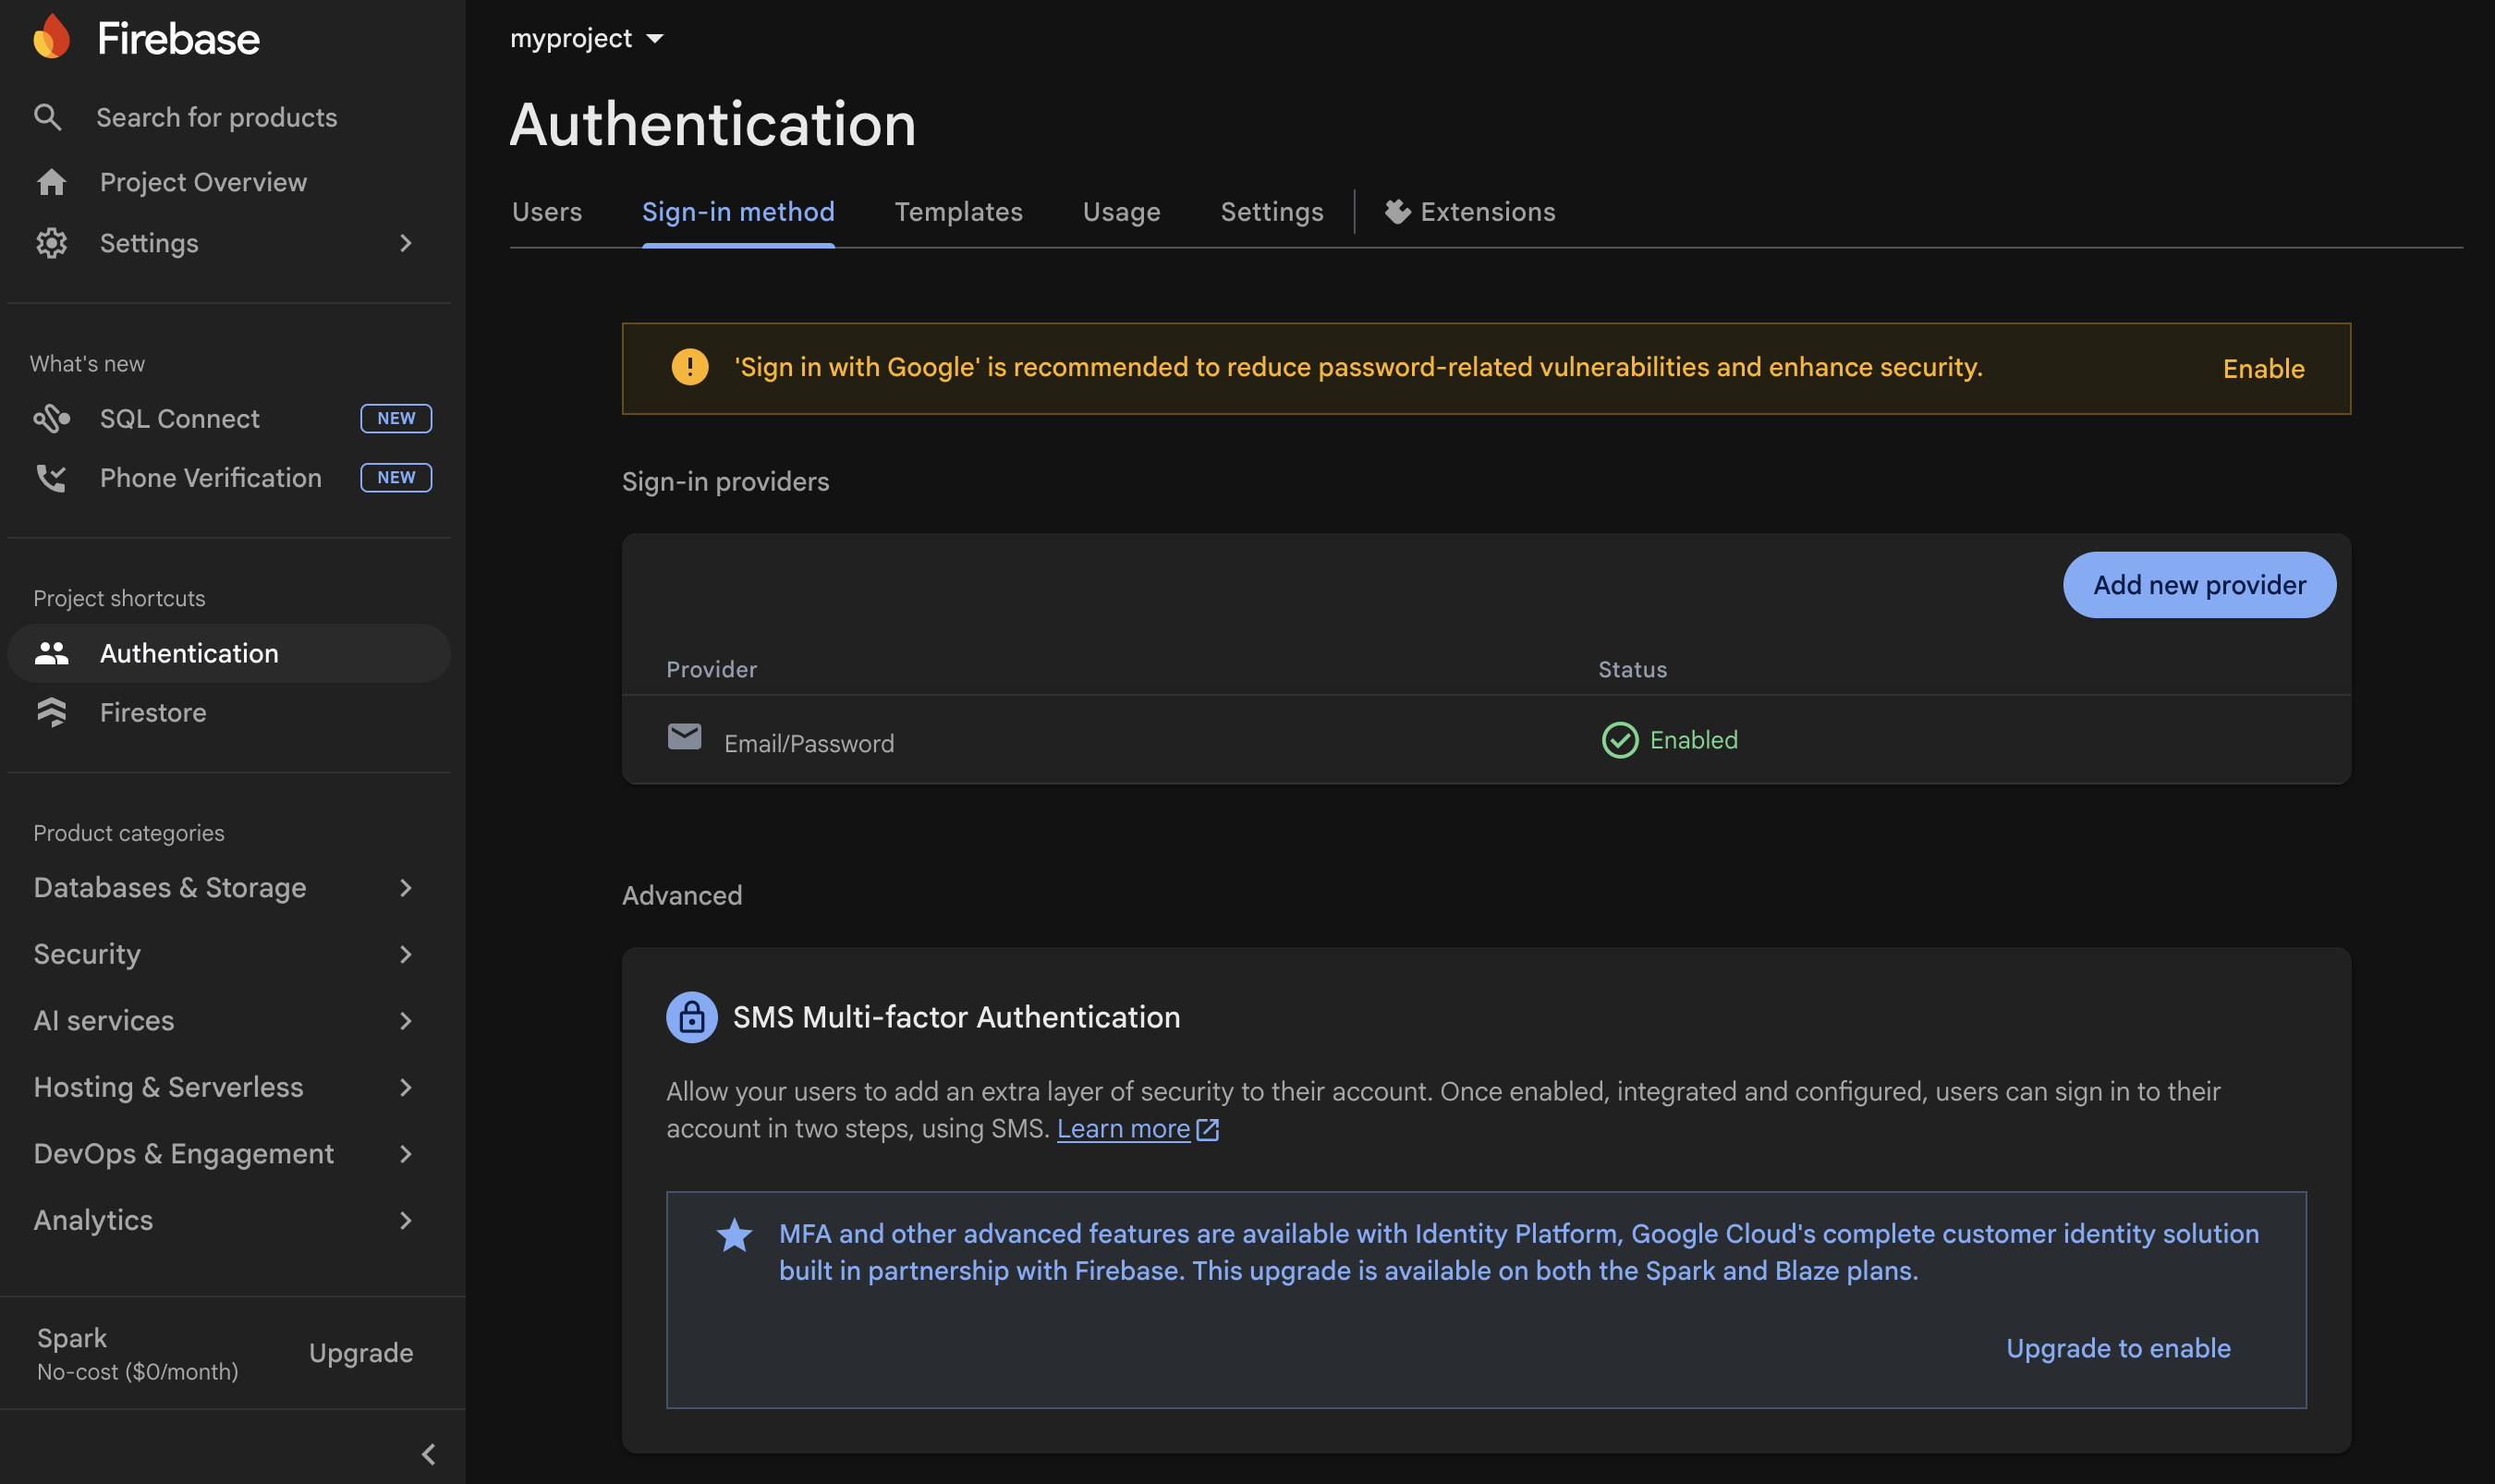
Step 12 — Open Authentication
In the left sidebar, select Security → Authentication.

Step 13 — Set up Authentication (1/4)
In the Authentication screen, click Get started.
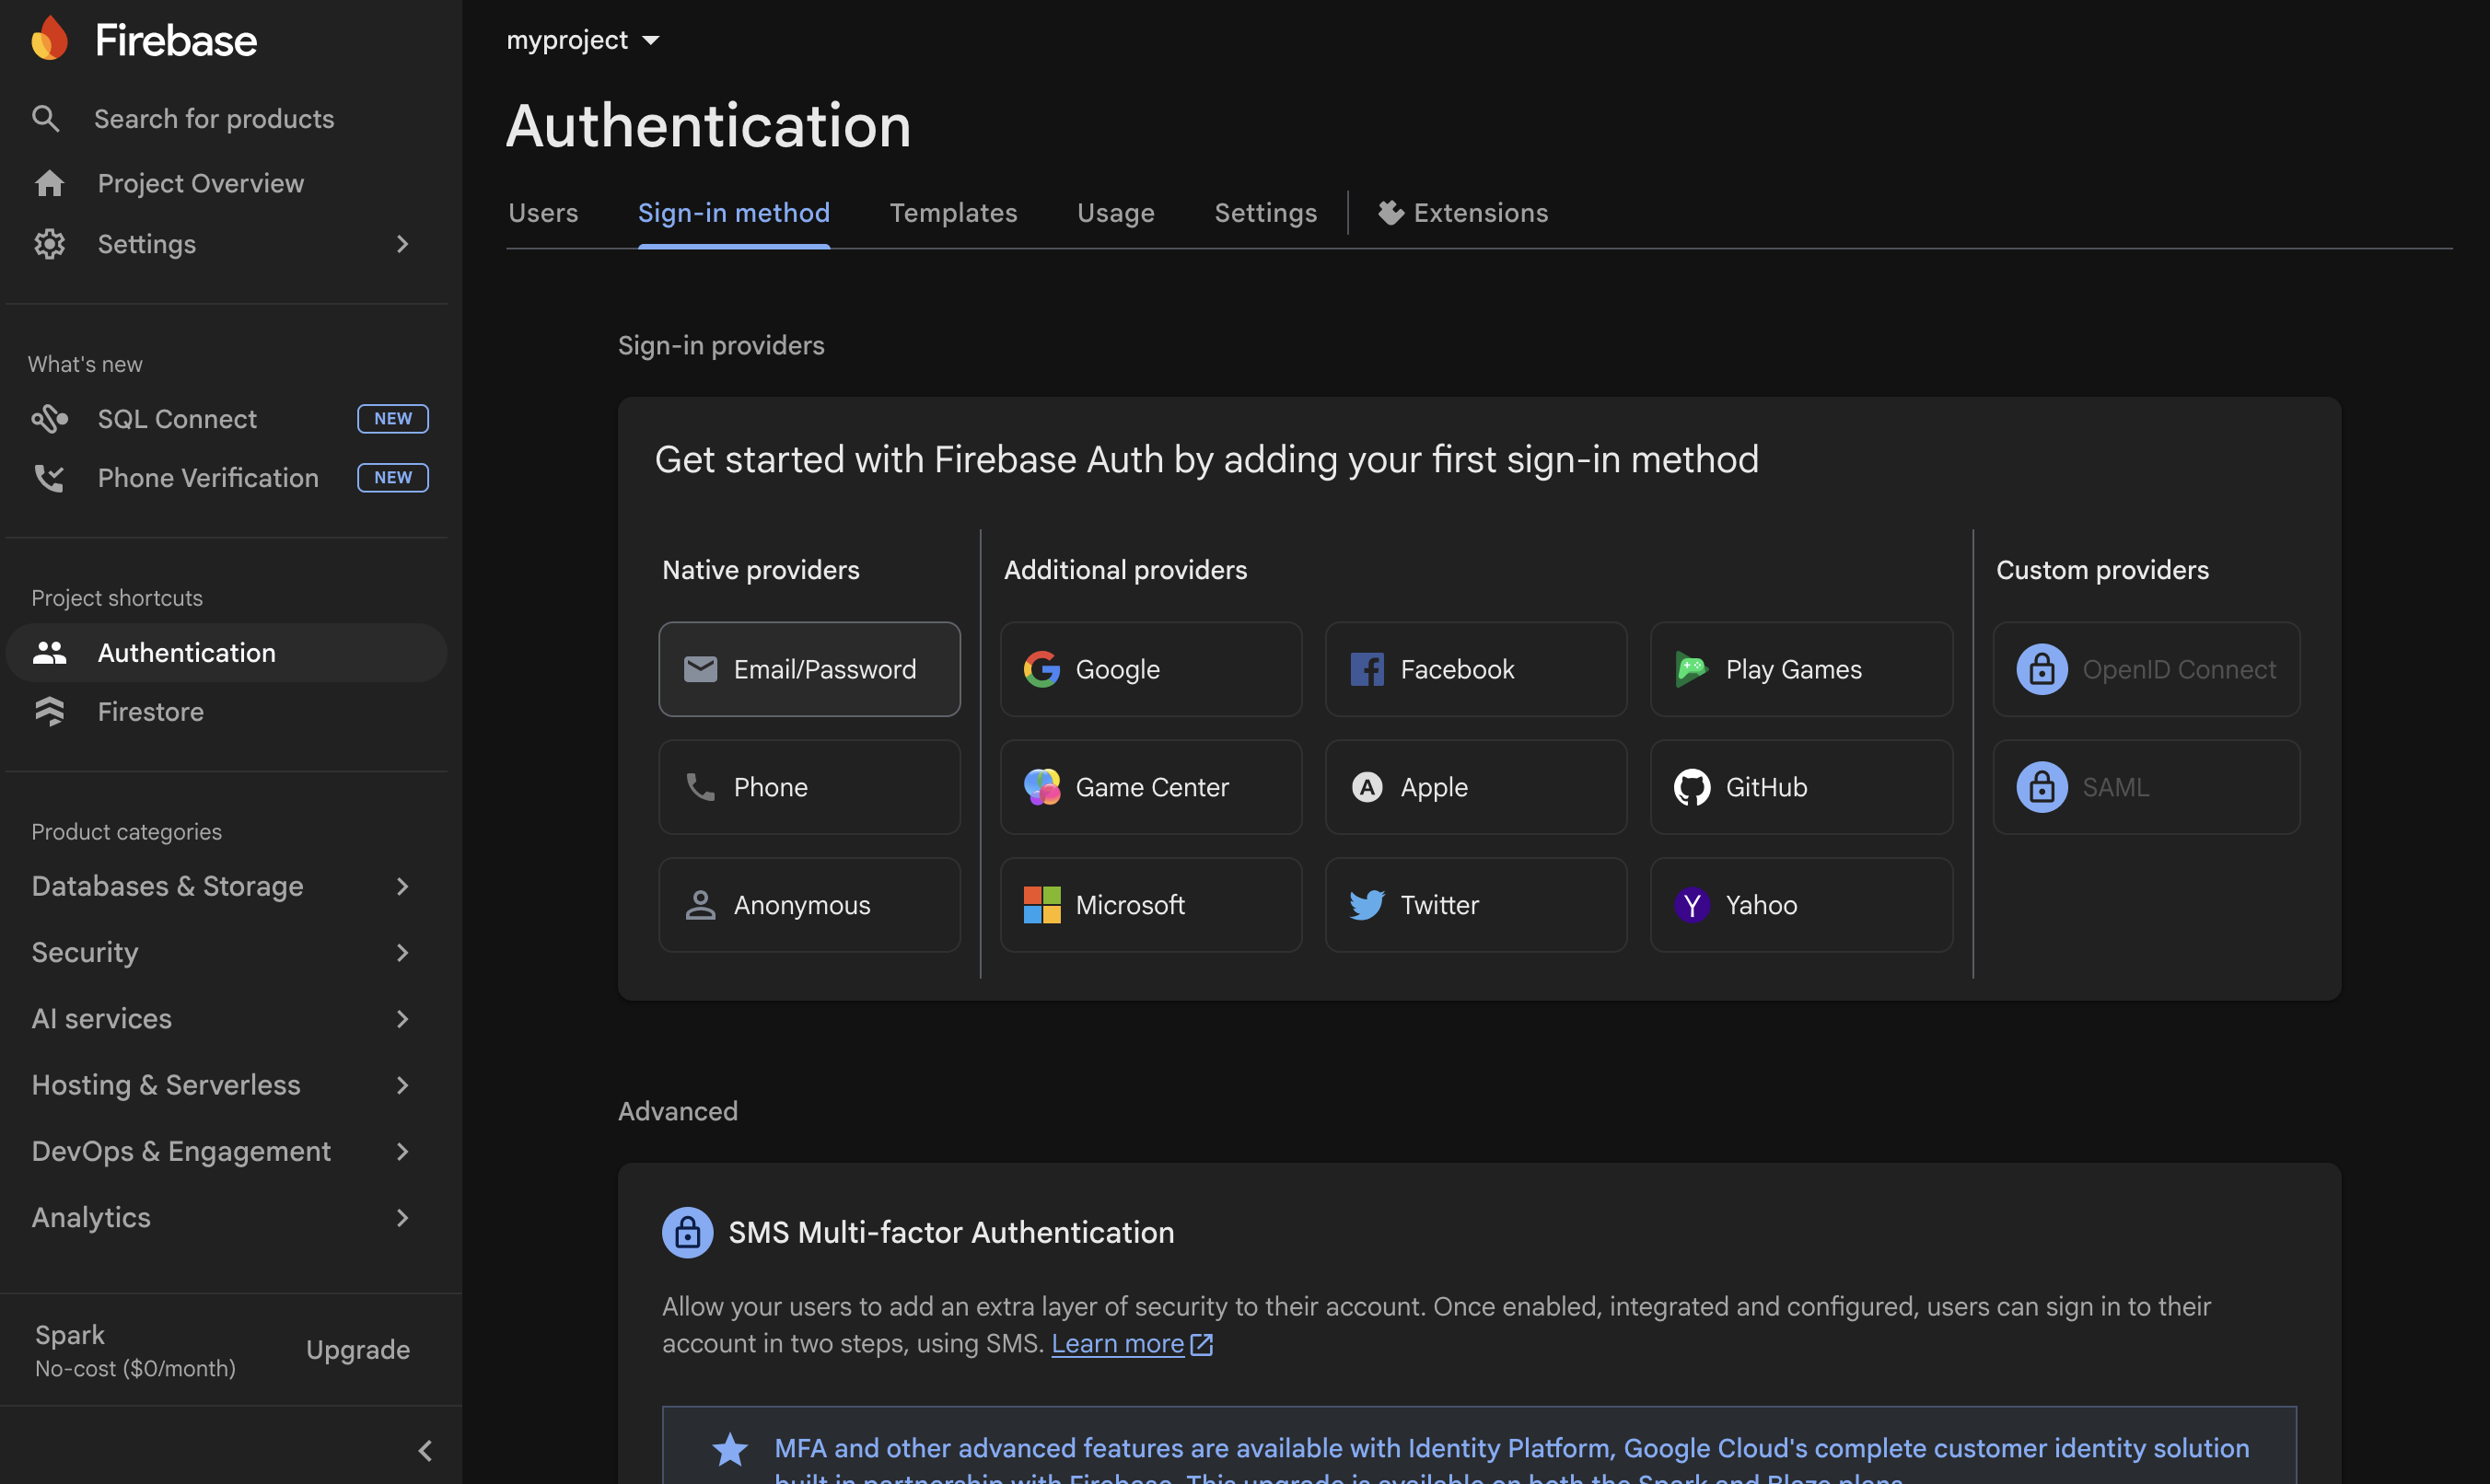
Step 14 — Set up Authentication (2/4)
In the Sign-in method tab, select Email/Password.
Step 15 — Set up Authentication (3/4)
Toggle Enable on the Email/Password row, then click Save.

Step 16 — Set up Authentication (4/4)
You're returned to the Sign-in providers list — Email/Password now shows as Enabled.
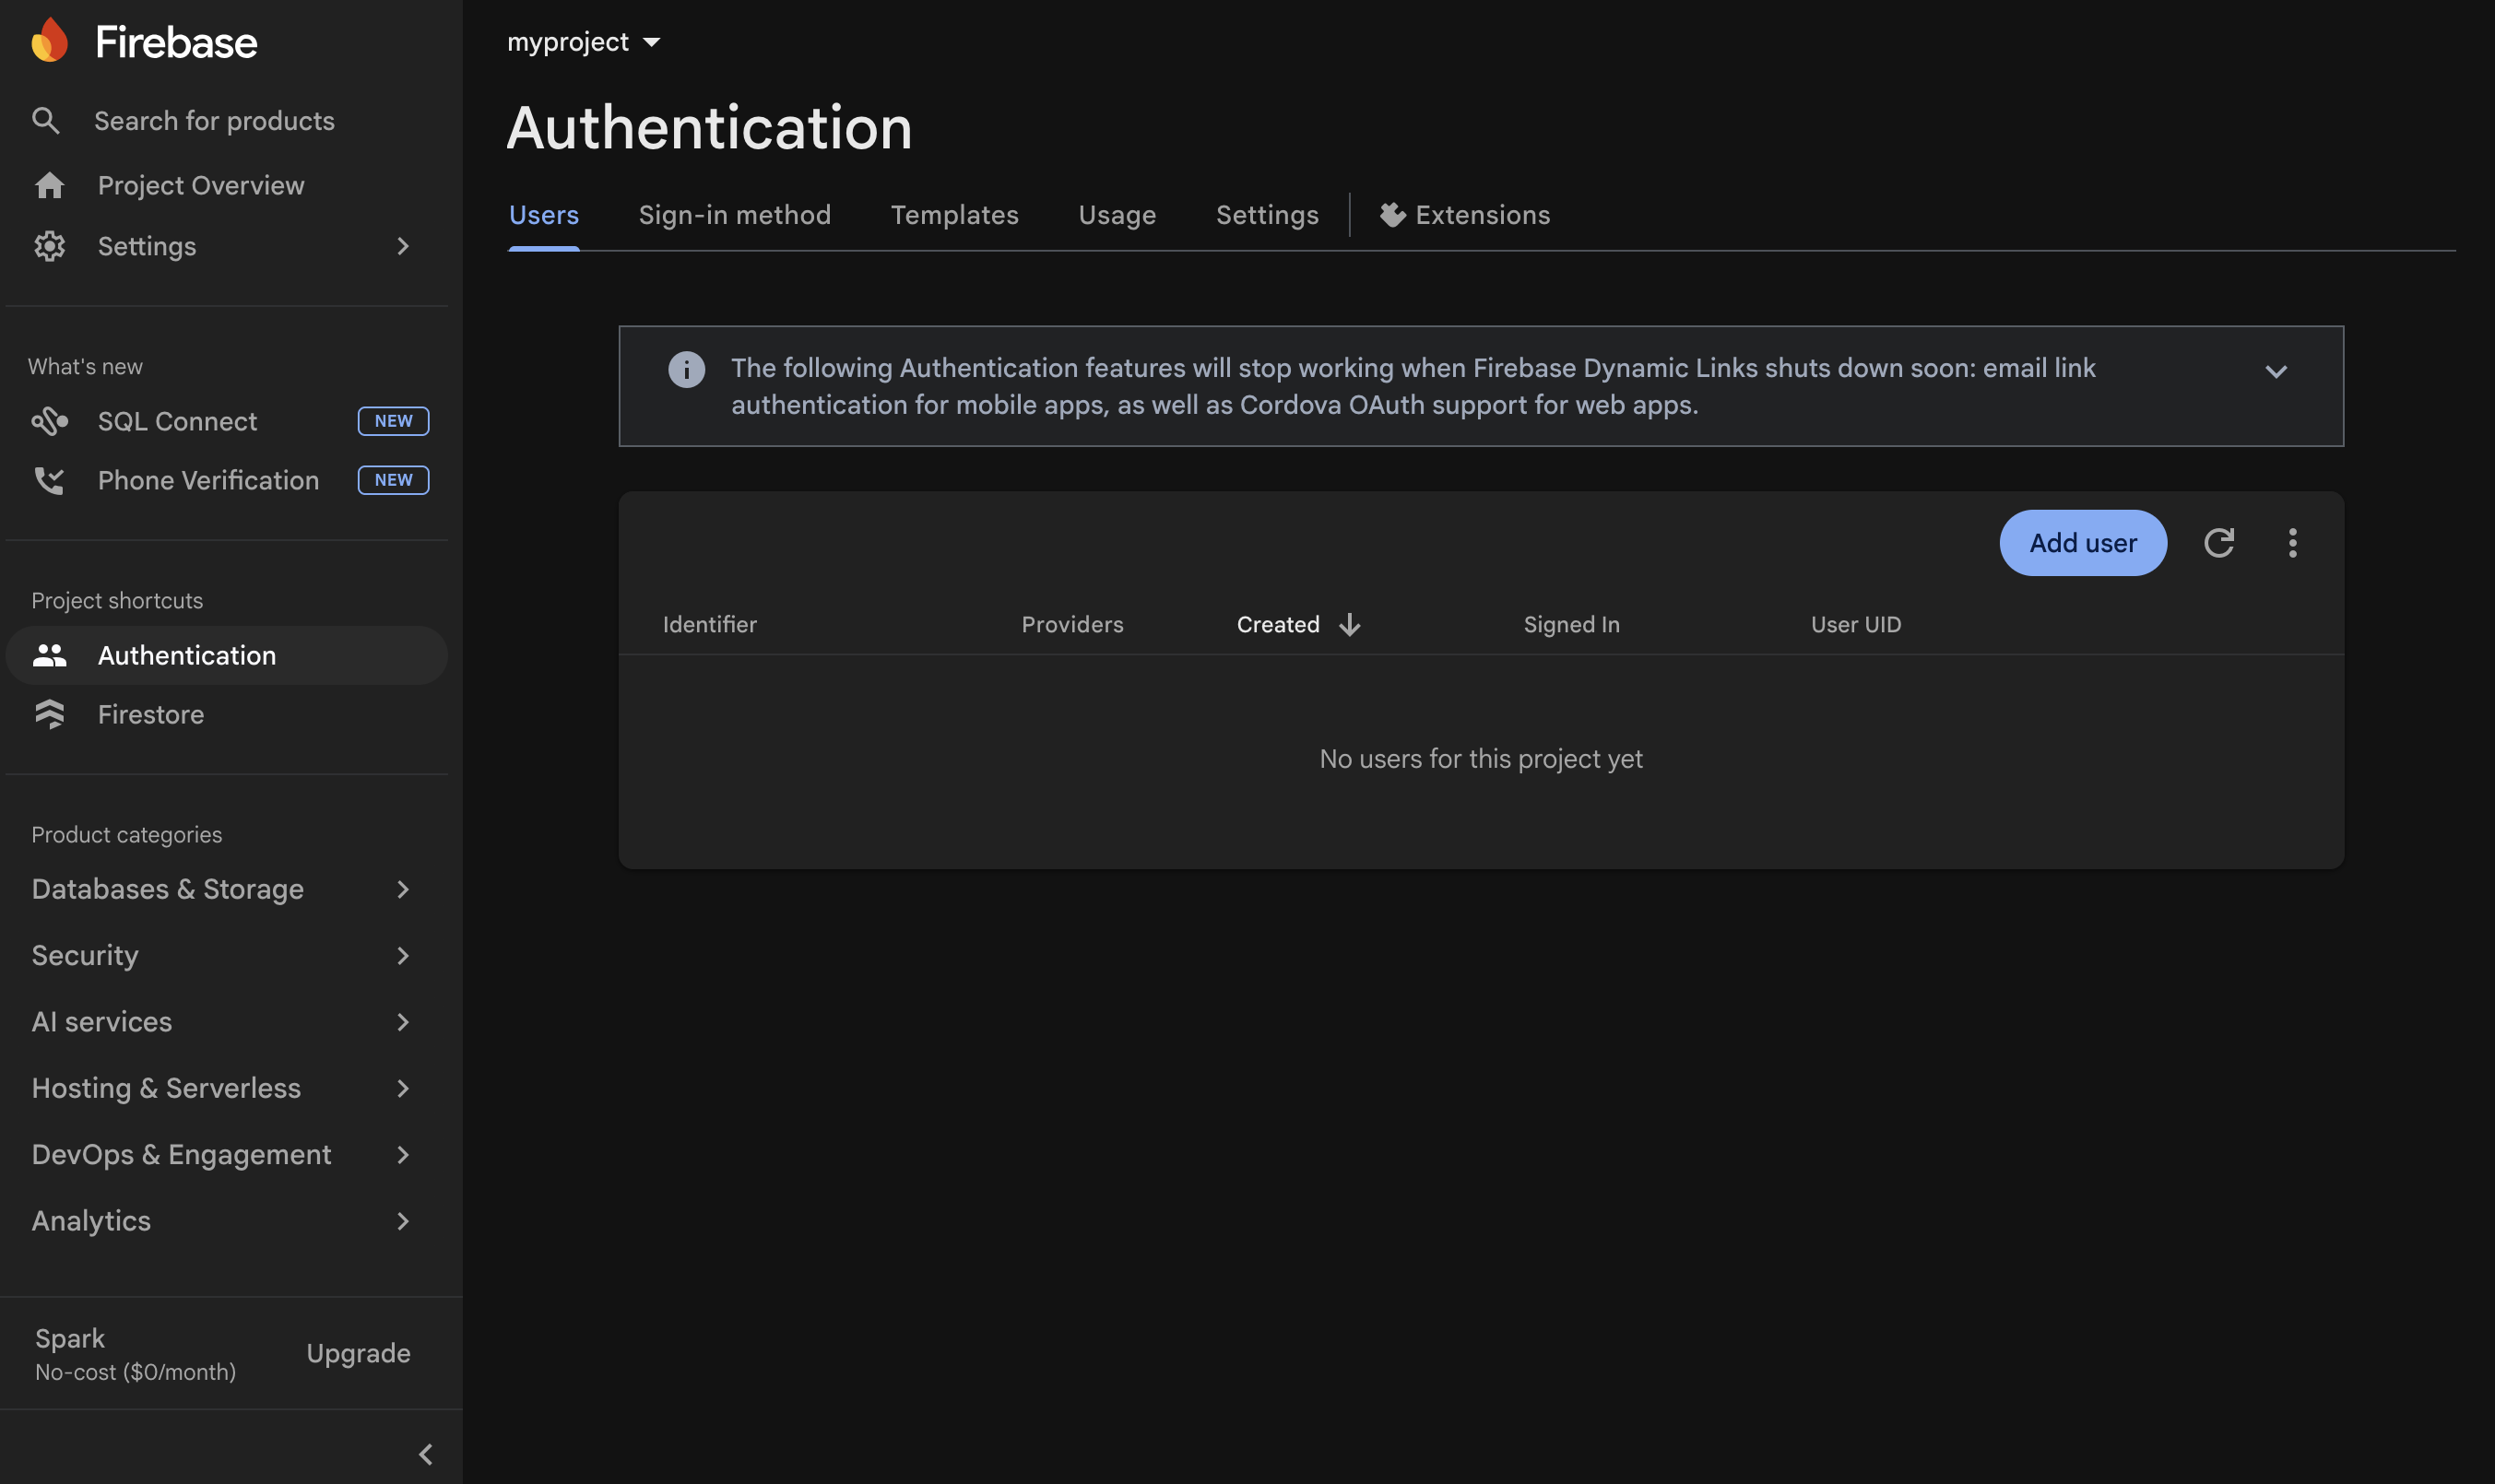
Step 17 — Add the bootstrap admin user (1/2)
In the Authentication screen, switch to the Users tab, then click Add user.
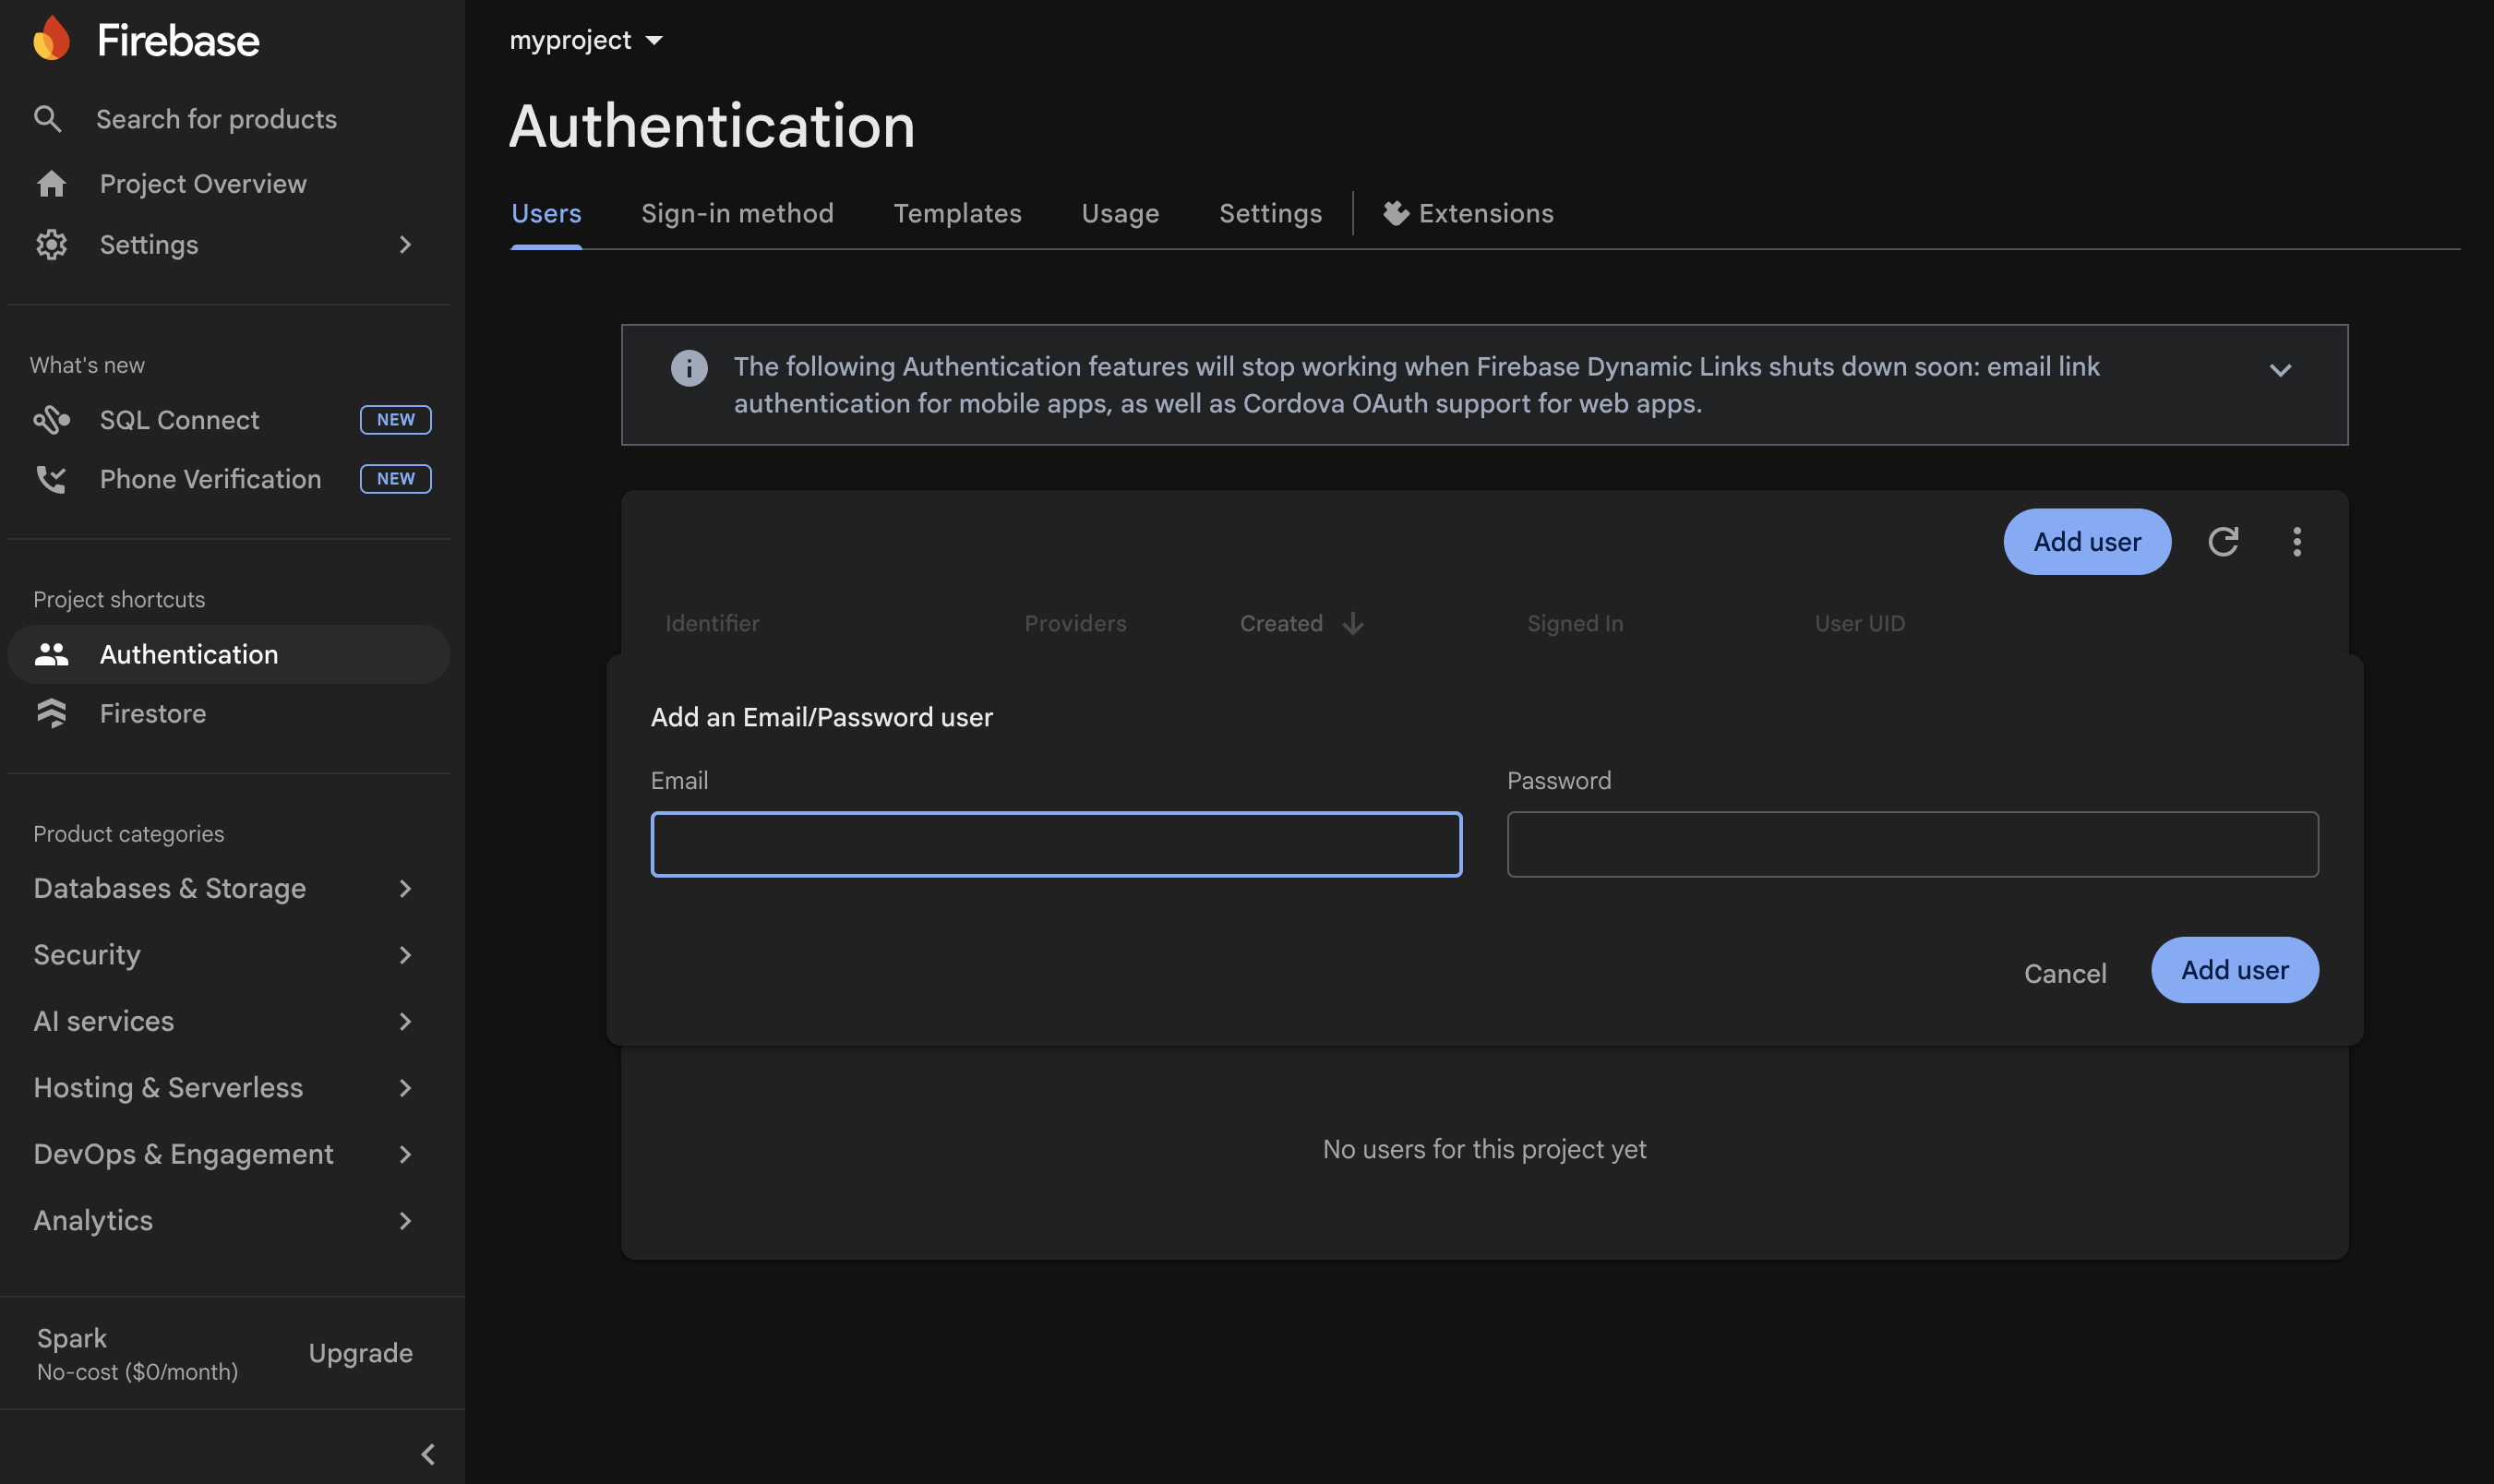
Step 18 — Add the bootstrap admin user (2/2)
Enter an email and a password to create the bootstrap administrator. Note both down — most projects use them as:
- The
VITE_ADMIN_EMAIL(or equivalent) value in their.envfile - The login credentials when first opening the deployed app
- The reference email inside the project's Firestore security rules (so this account is granted admin privileges)
Step 19 — Register a web app and copy your Firebase config
Your app needs a few public Firebase identifiers (project ID, API key, etc.) to connect to your project from the browser. Generate them by registering a web app:
1. In the Firebase console, click the gear icon (top left) → Project settings.
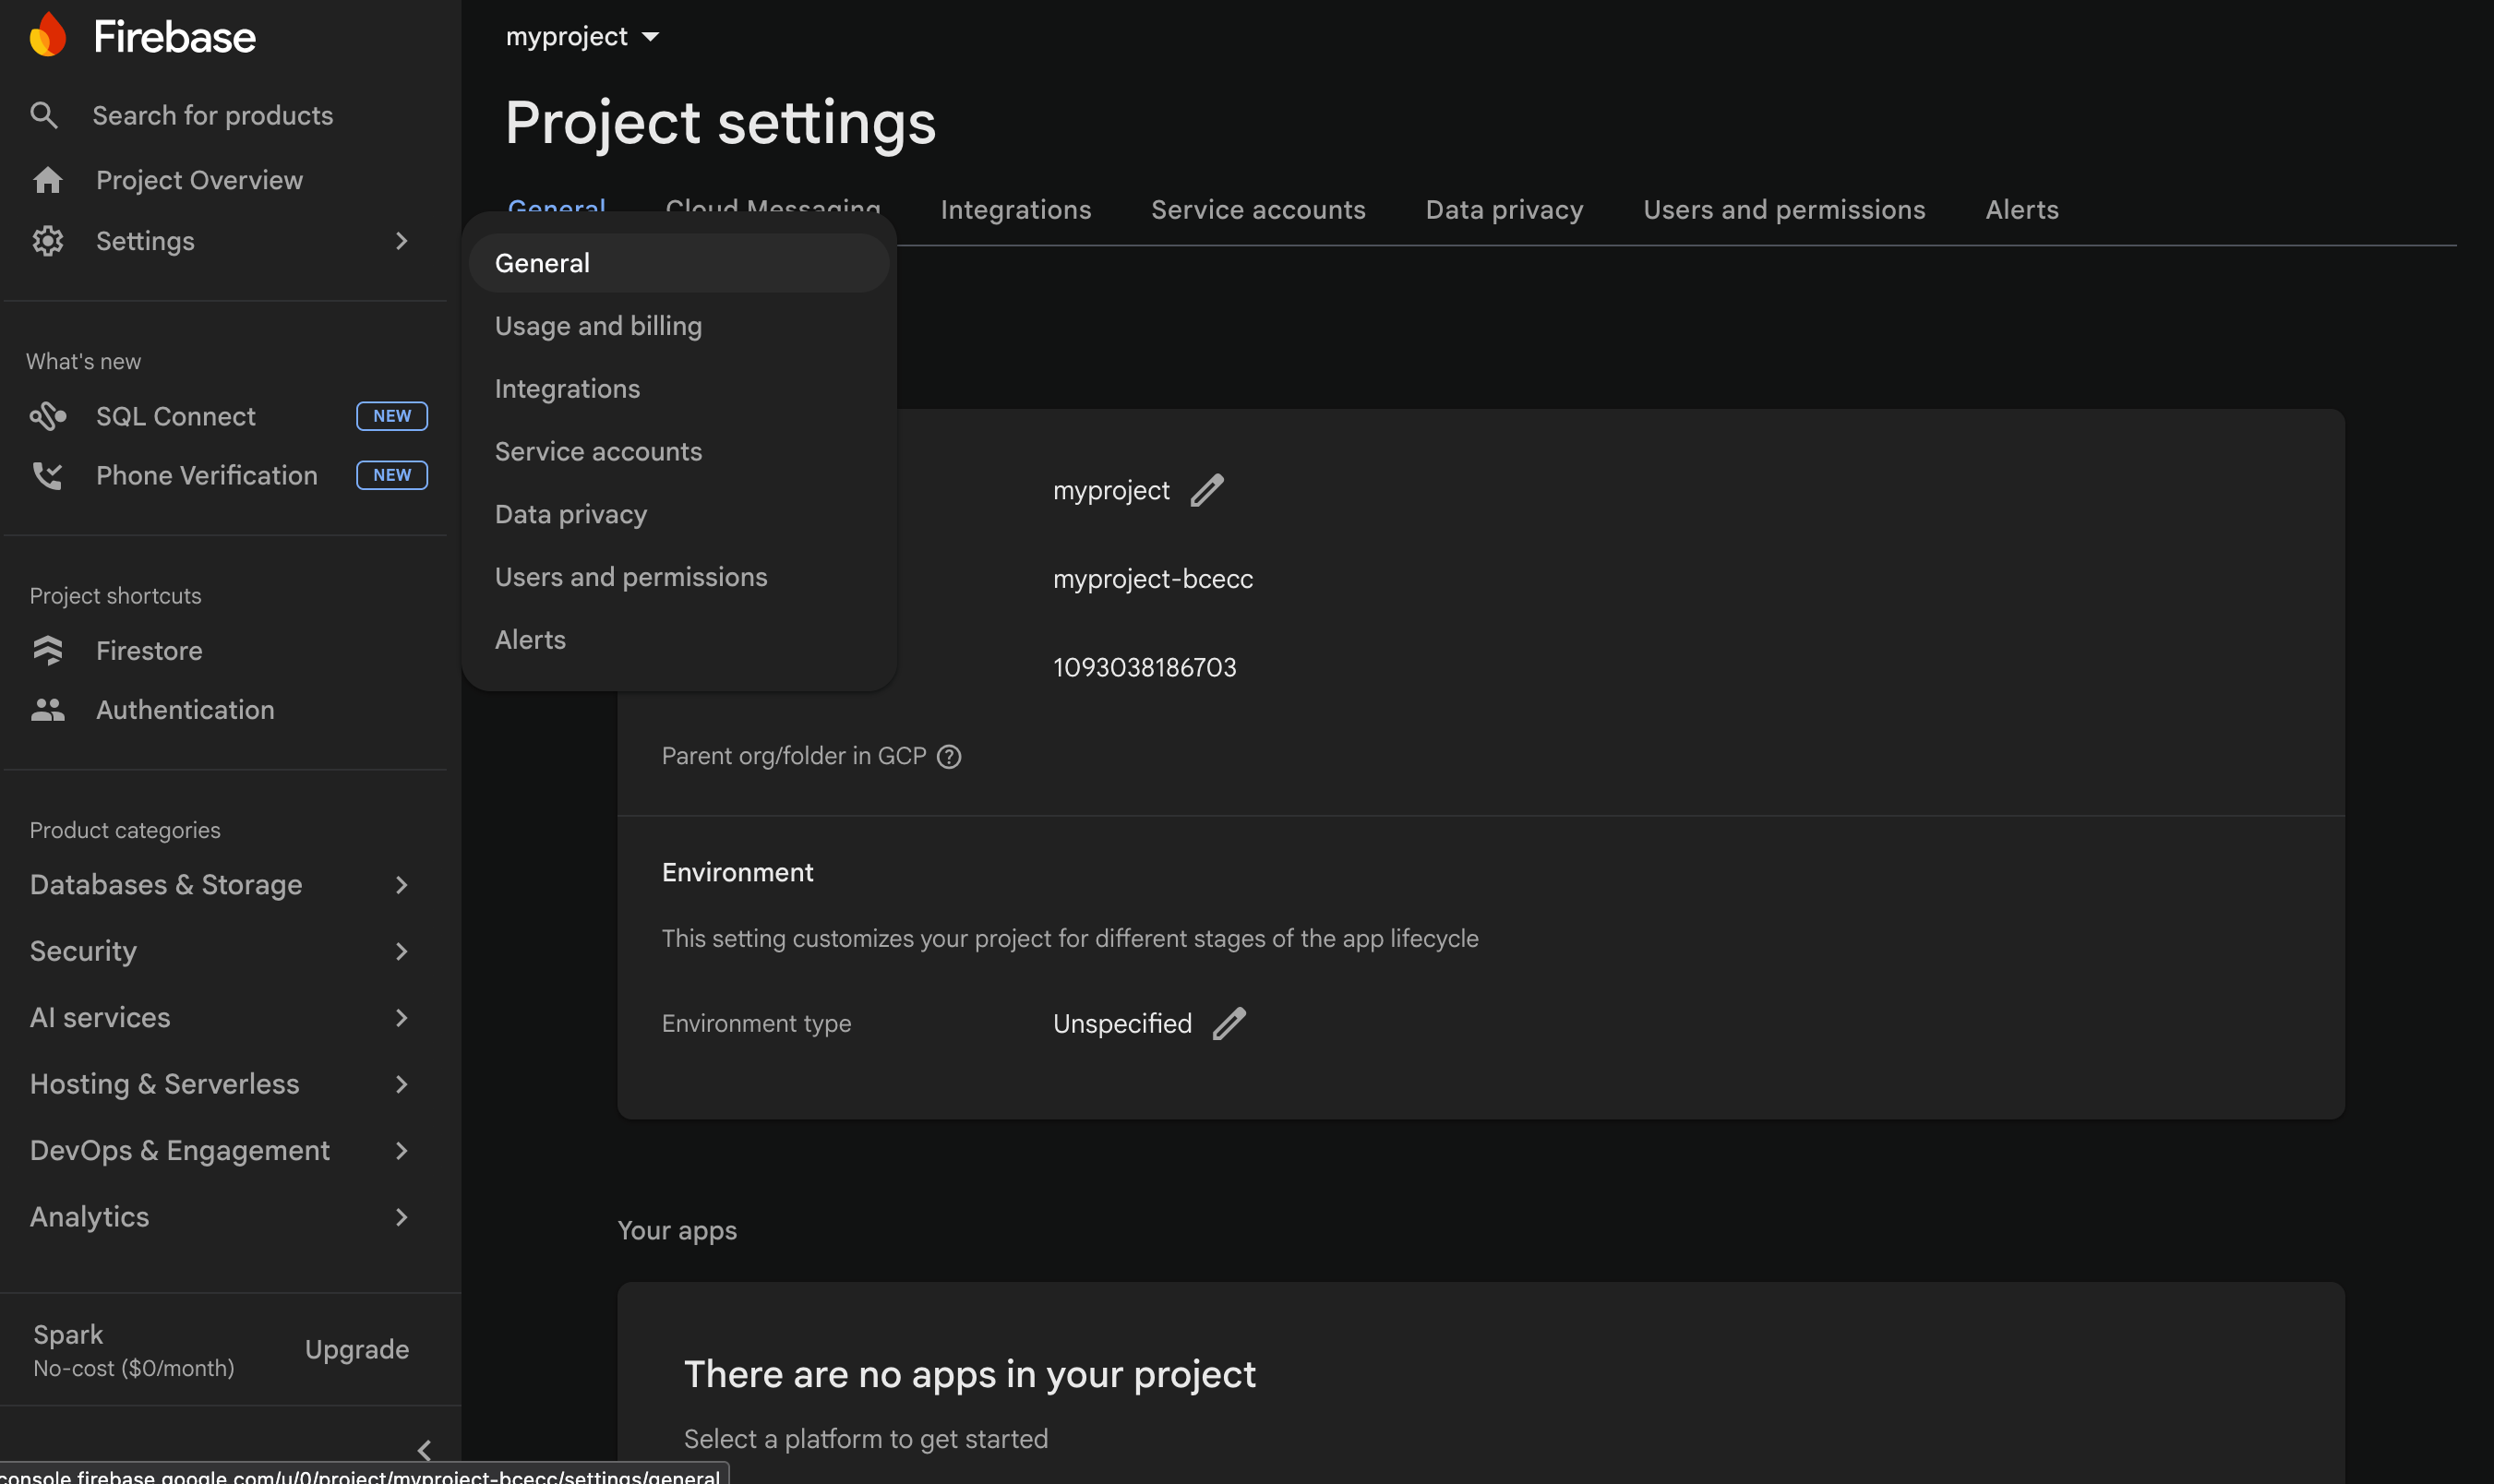
2. Scroll down to the Your apps section.
3. Click the </> Web icon to register a new web app.
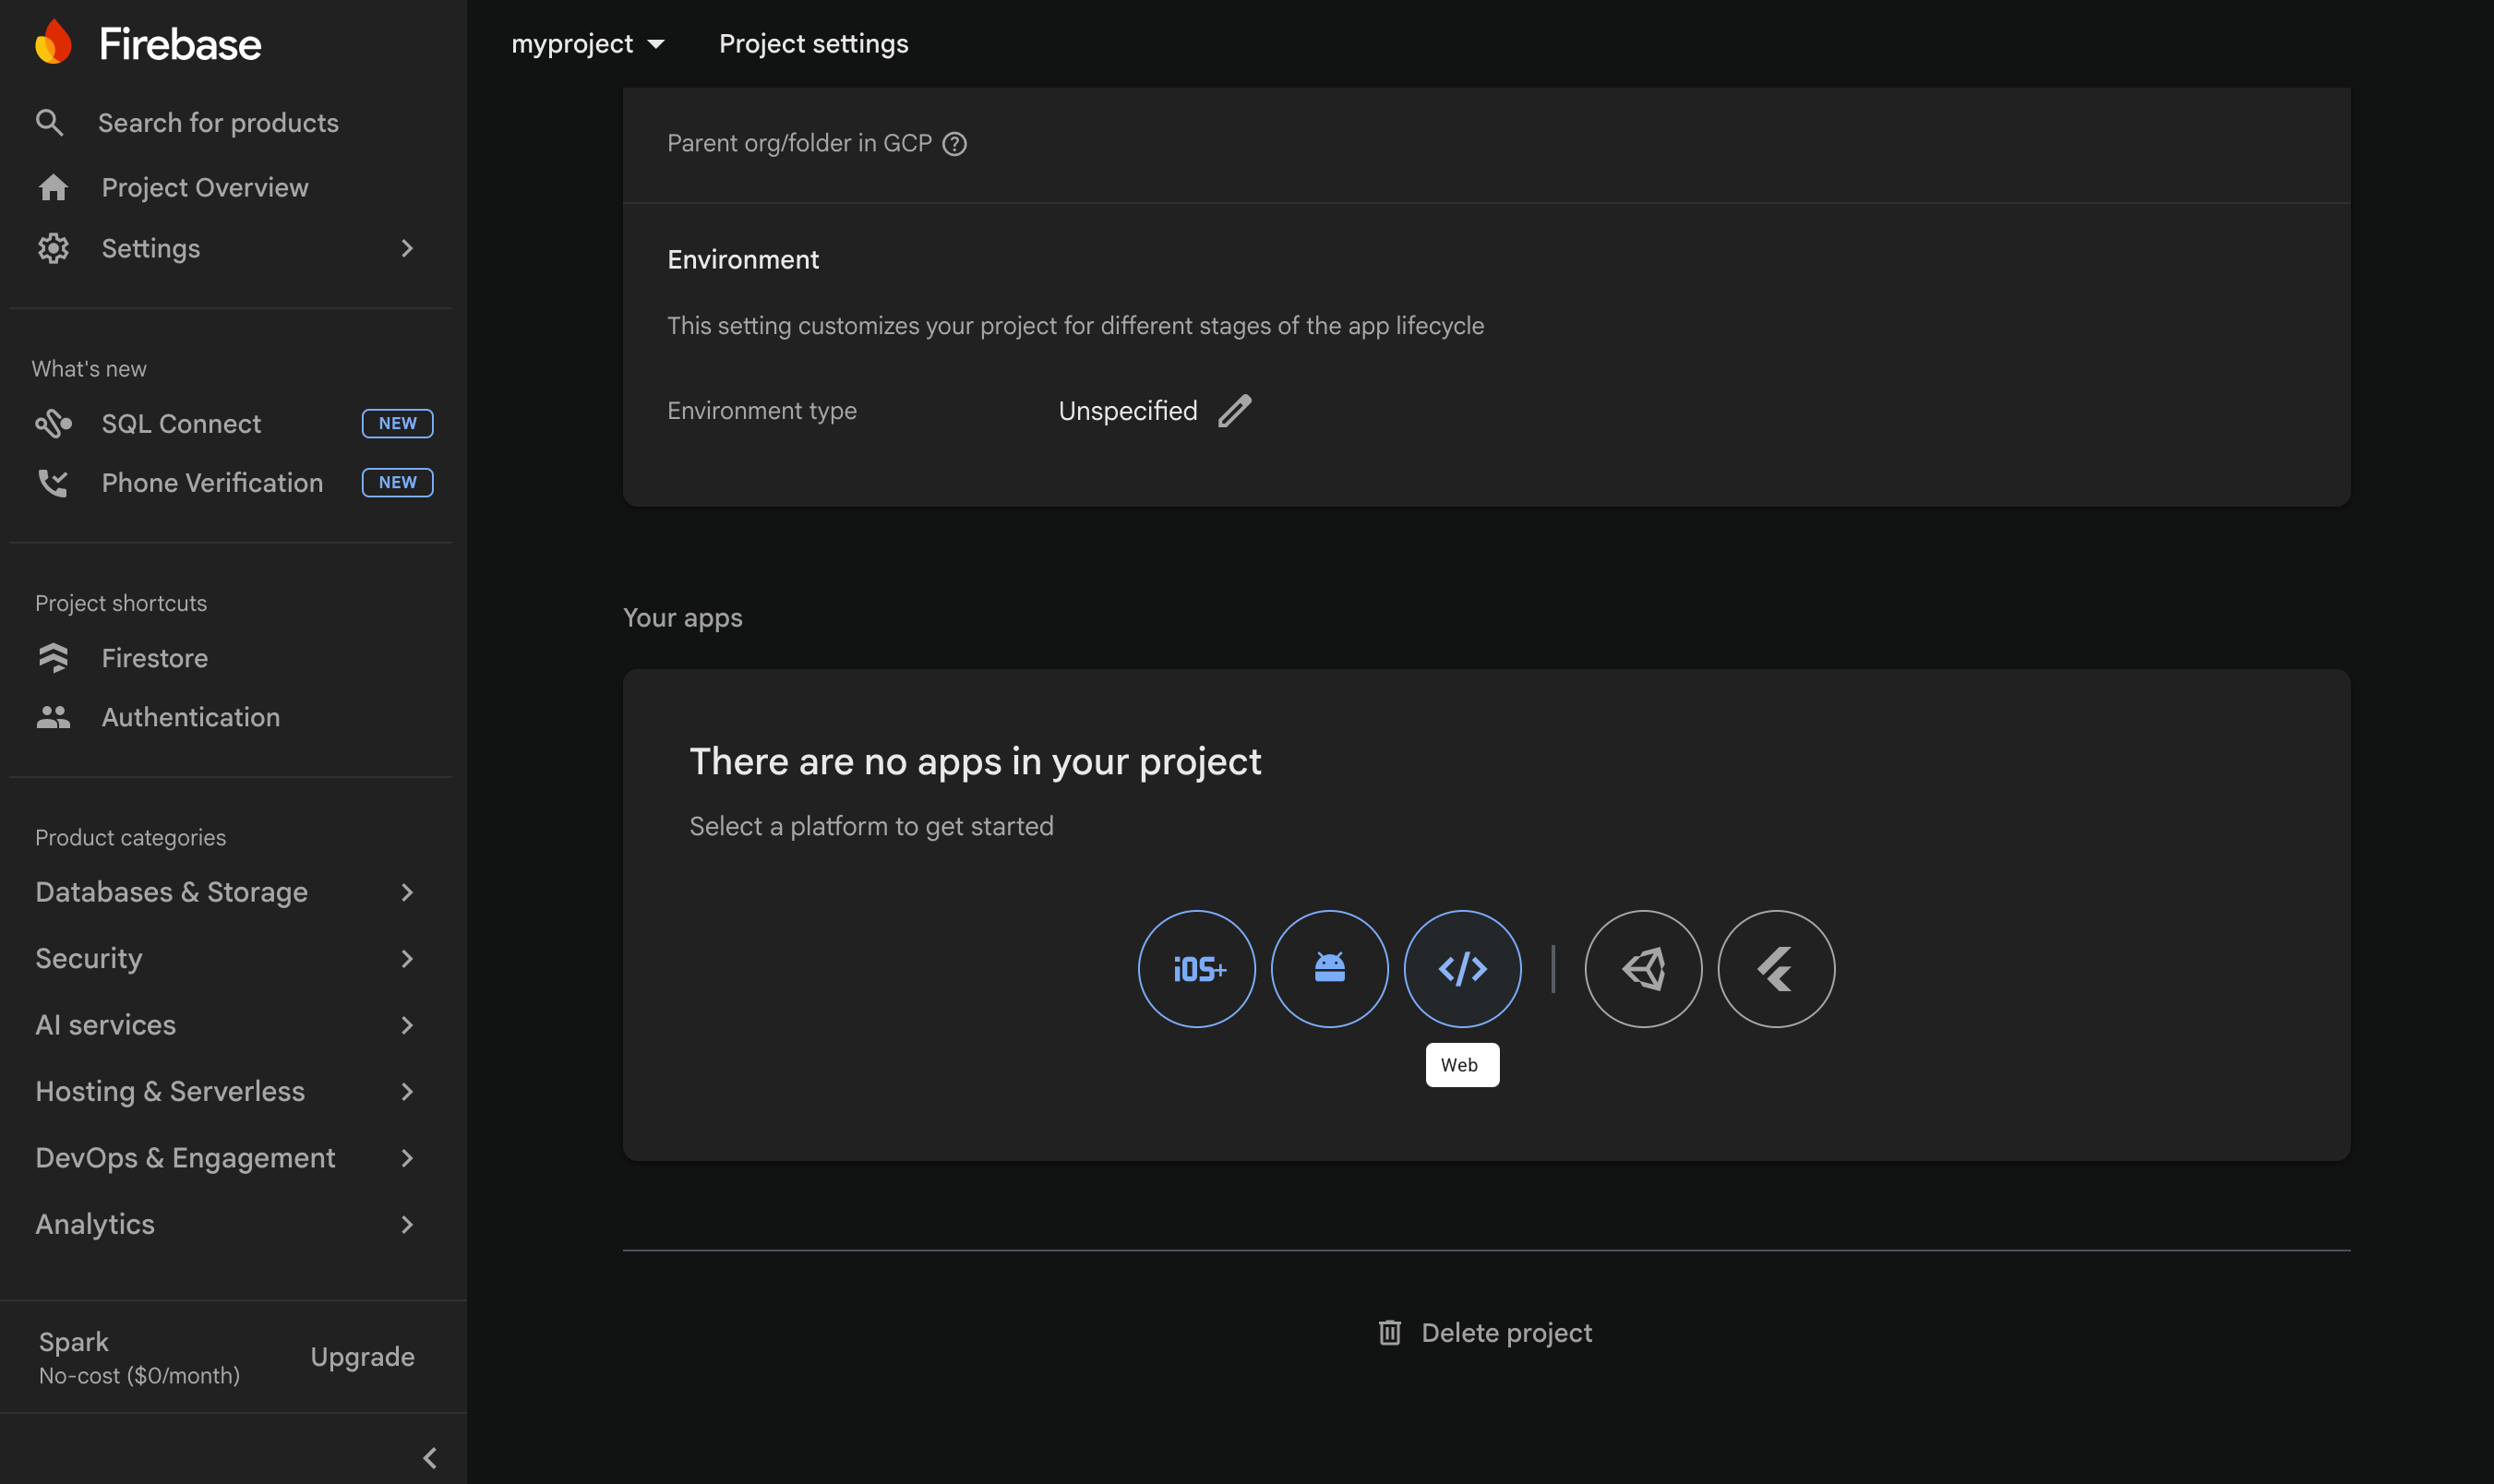
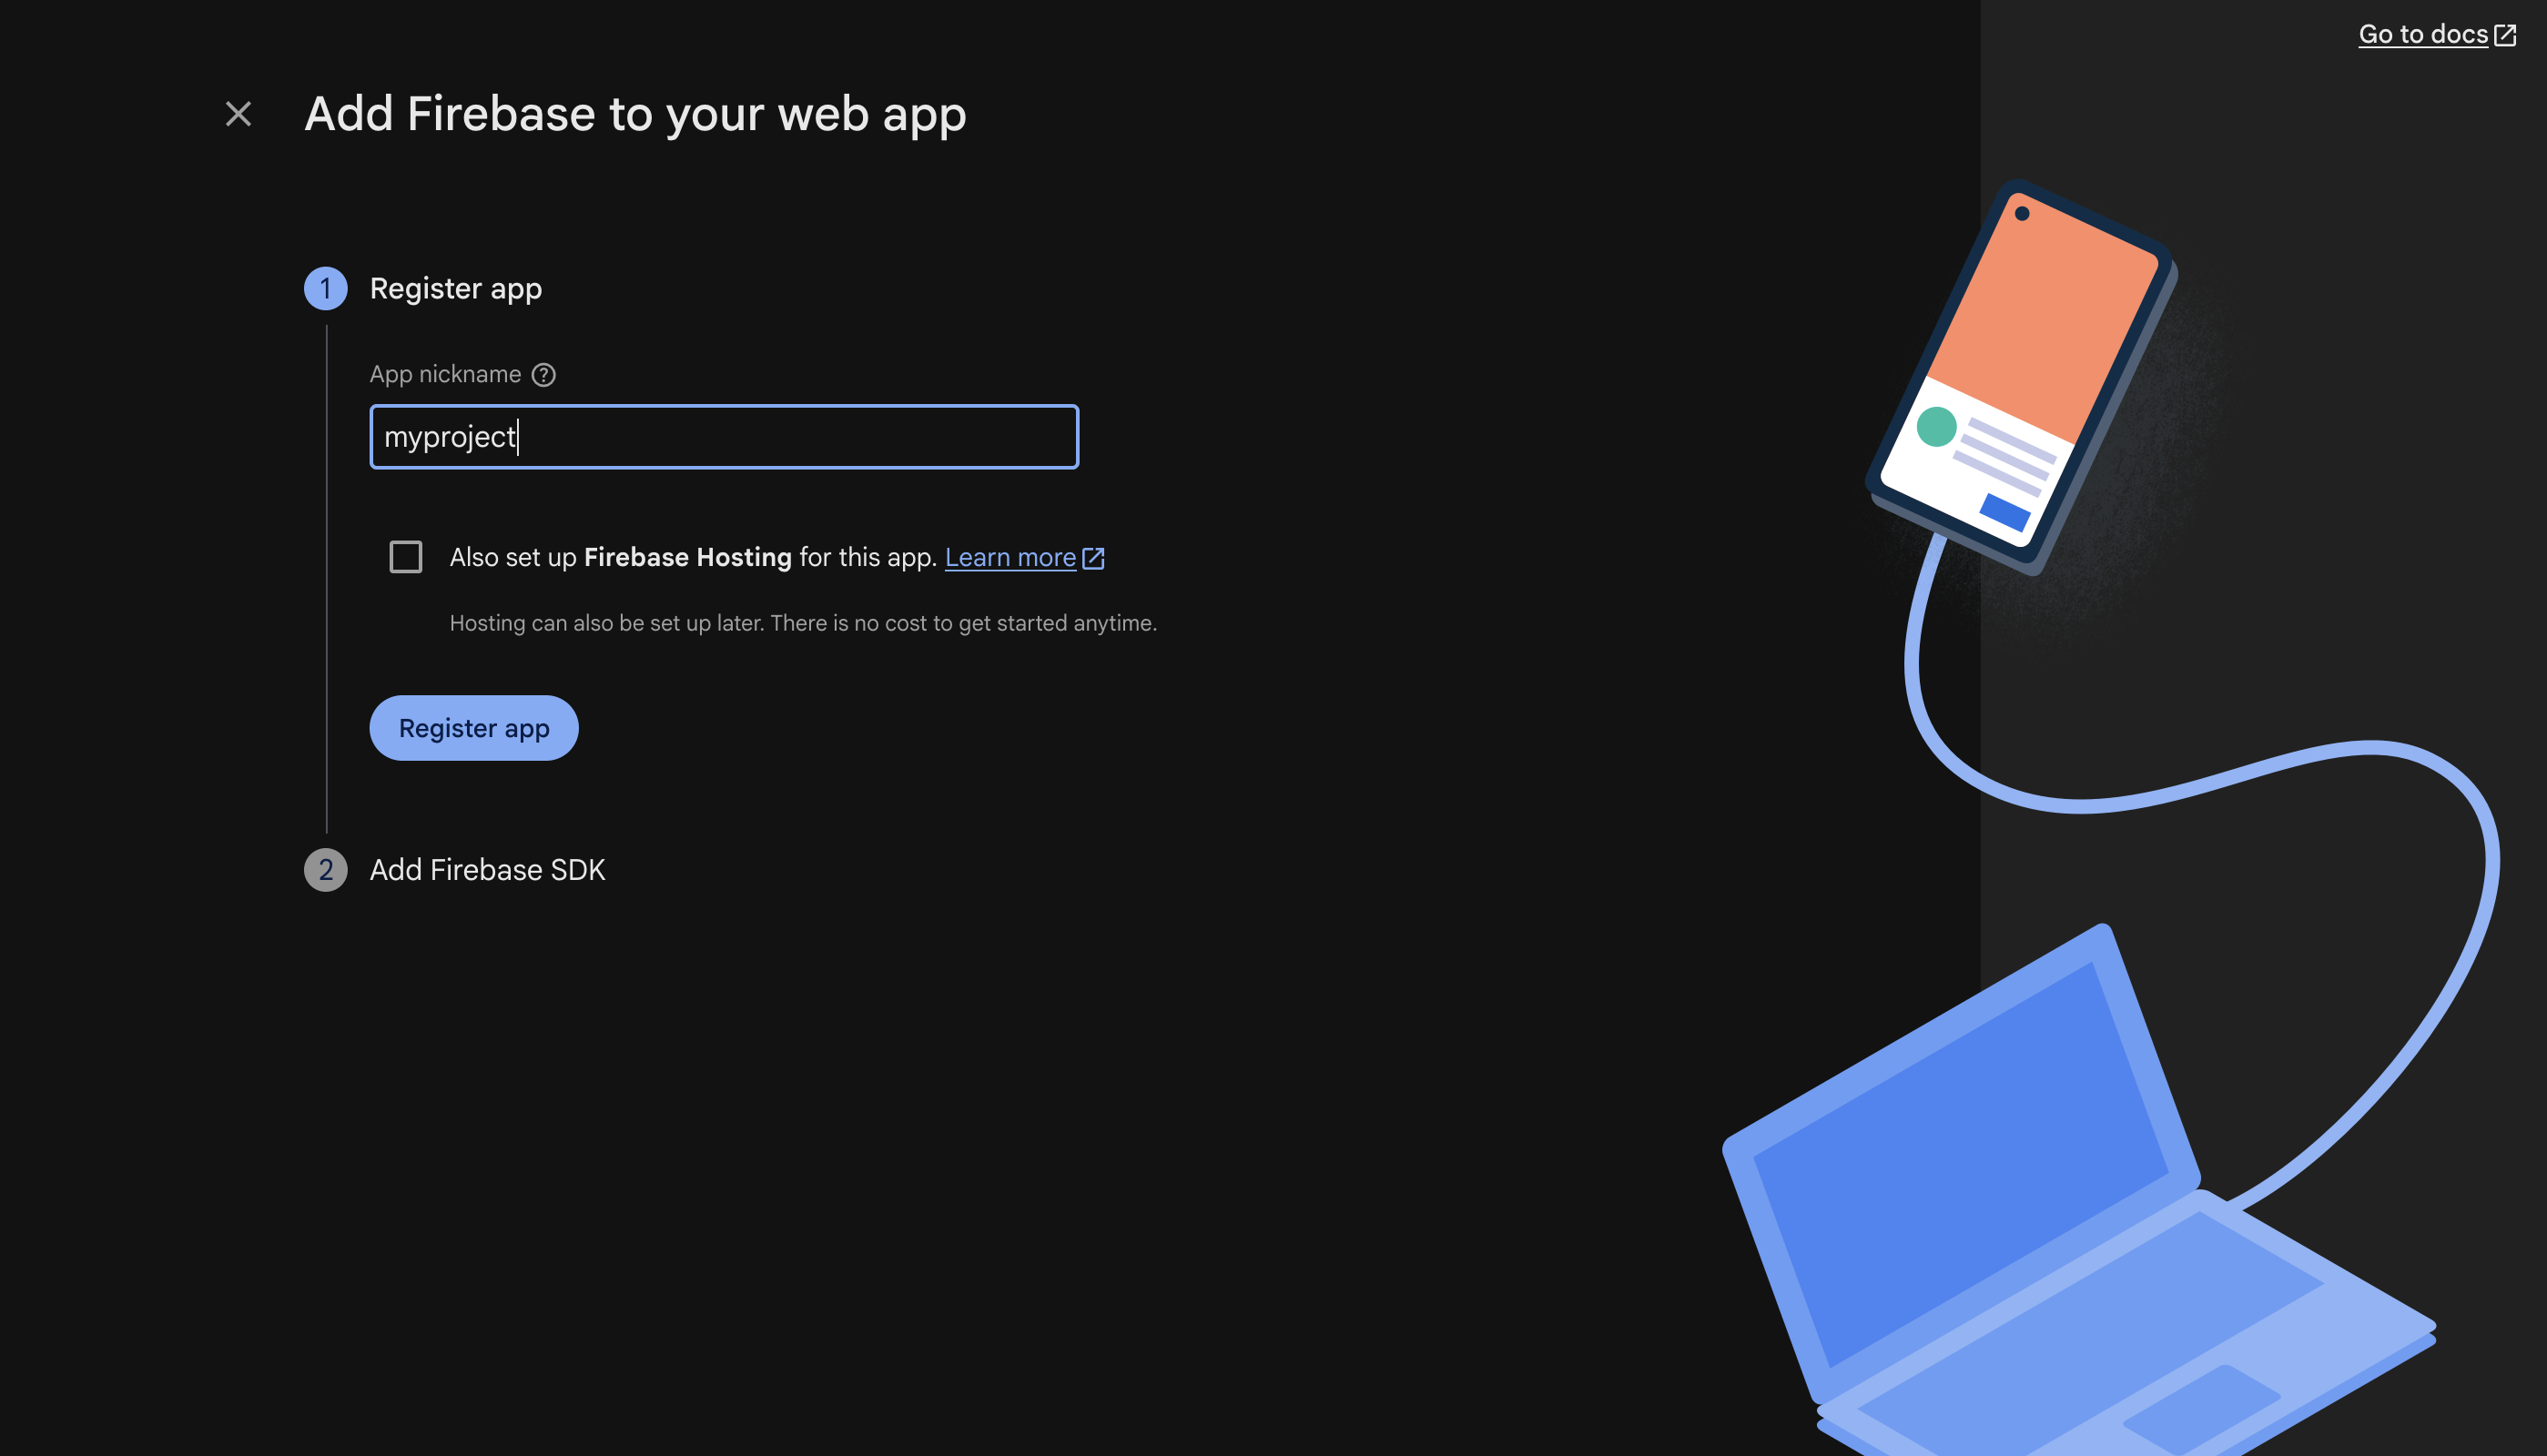
4. Give it any nickname (e.g. your project's name) and click Register app. Skip the Firebase Hosting setup — Flexweg will host the site.
5. Firebase displays a code block with a firebaseConfig object. Copy the values — you'll paste them into your project's .env file.
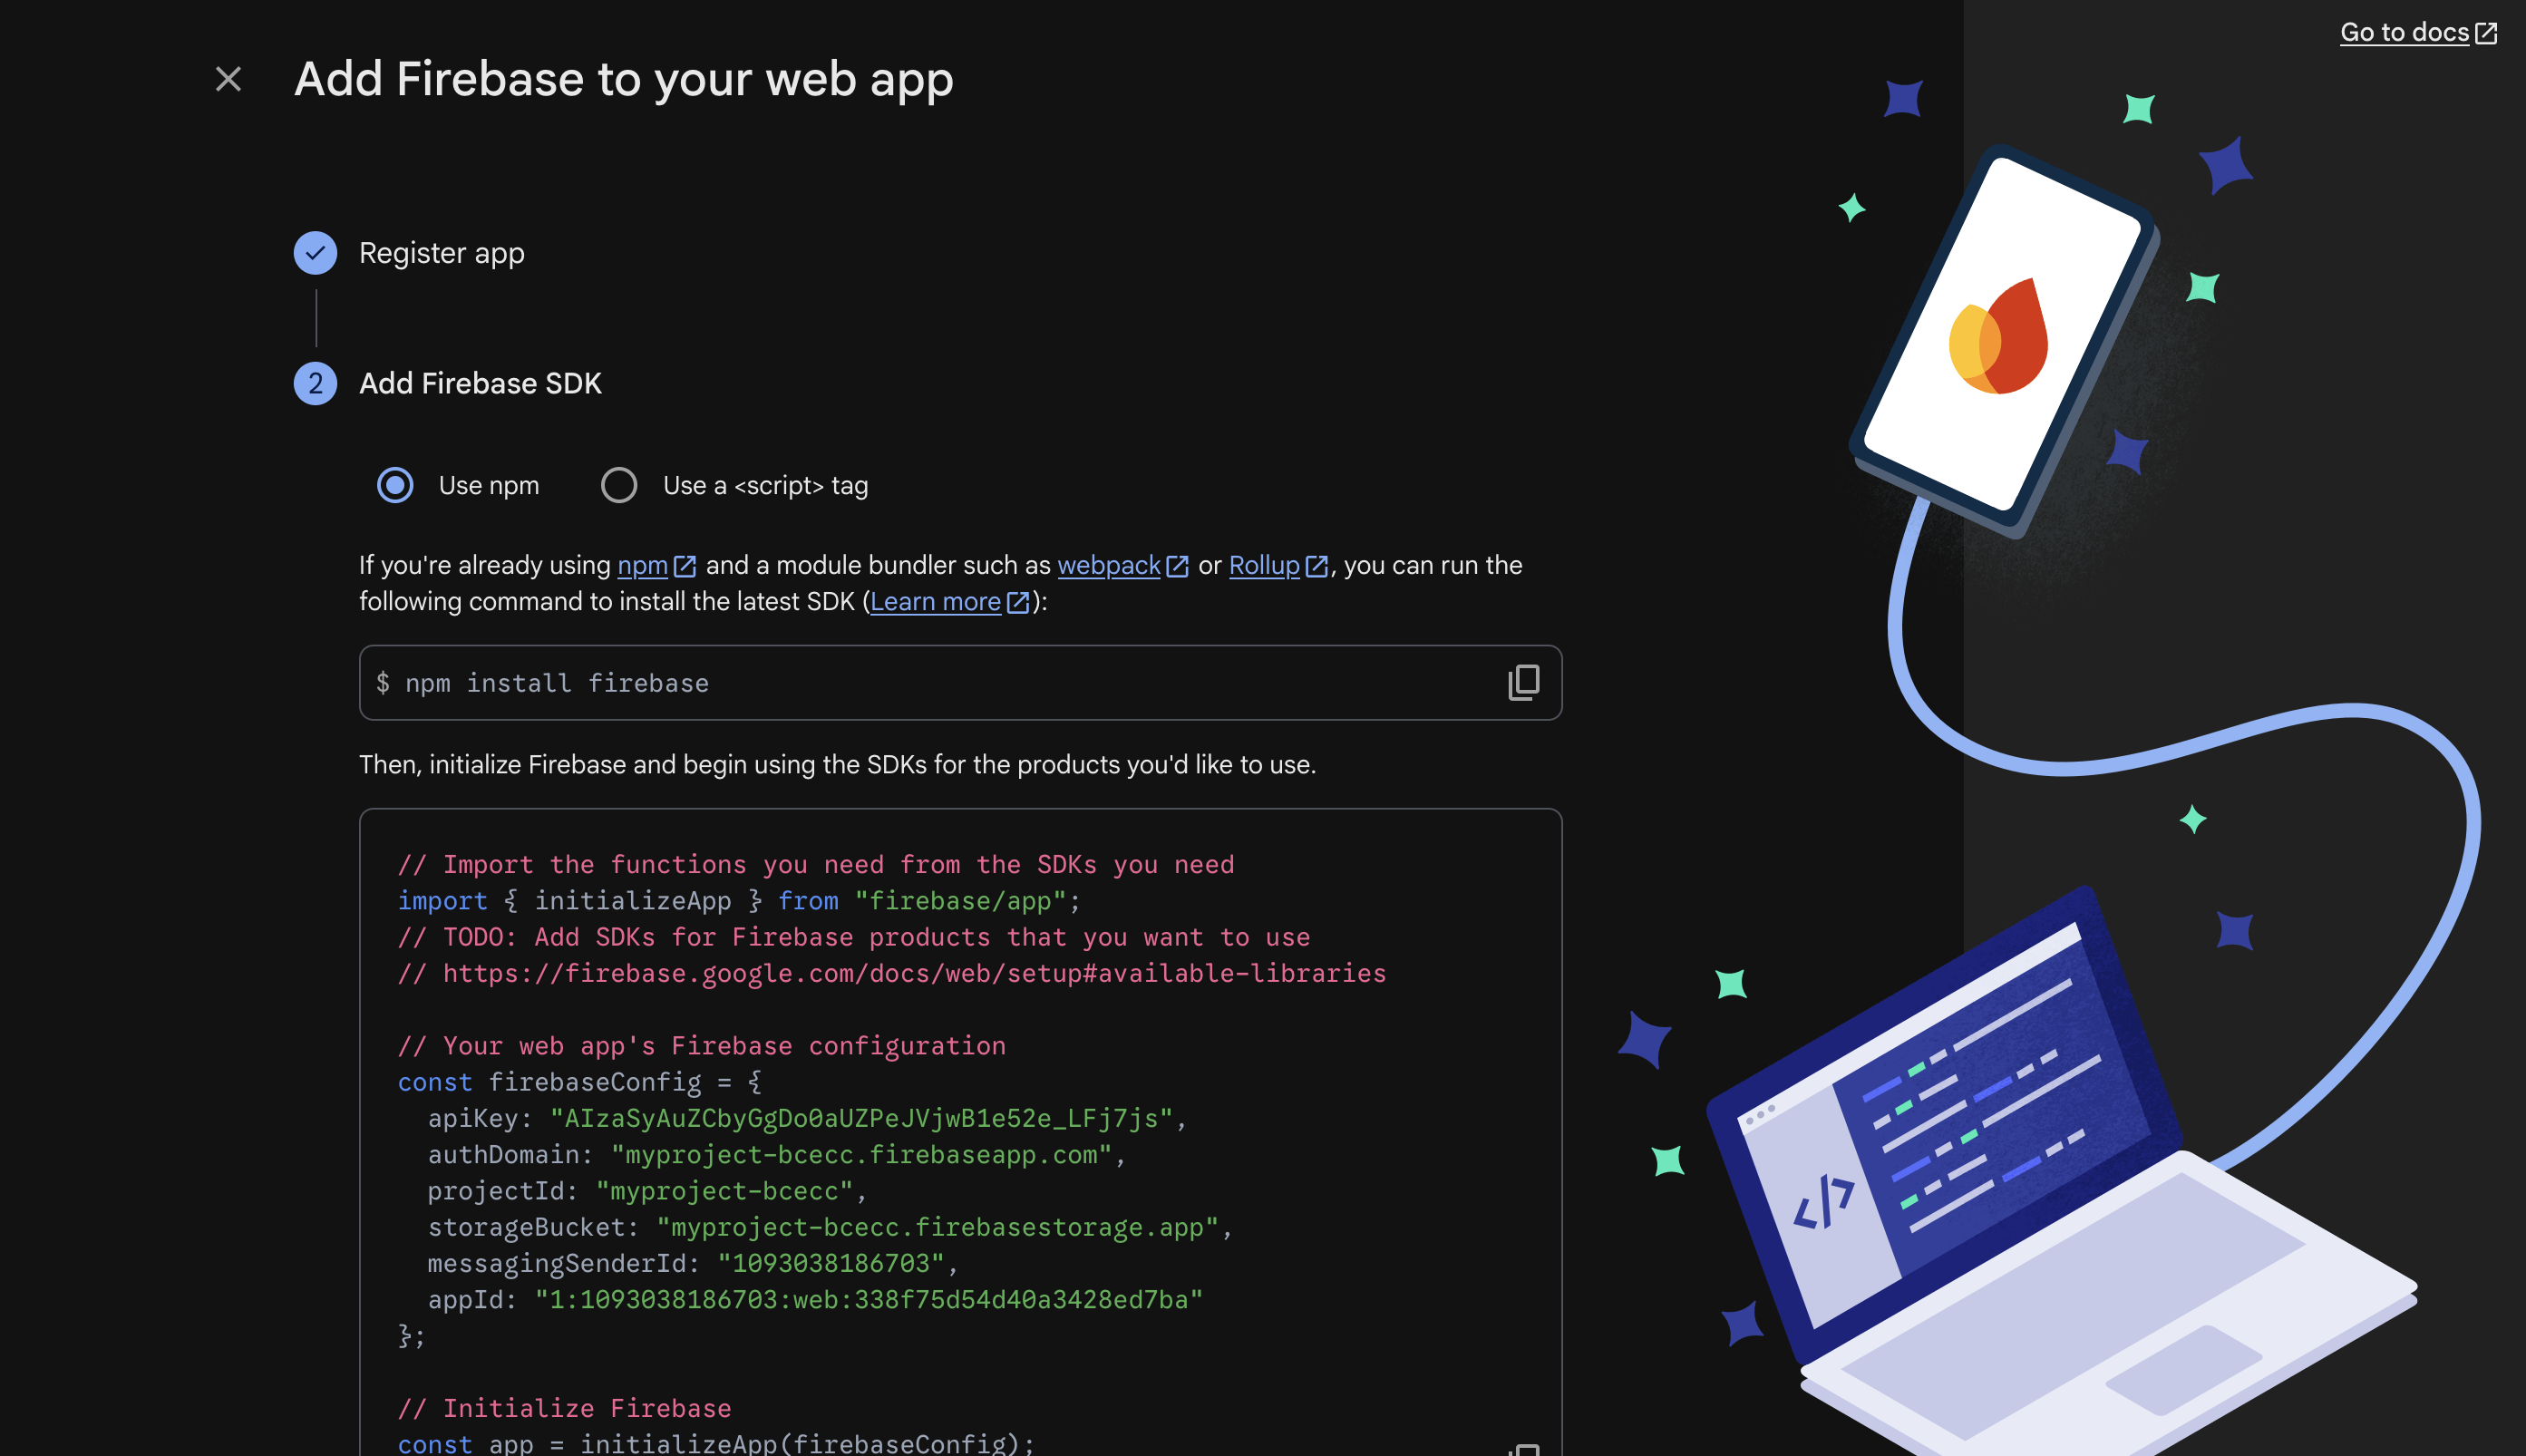
You now have everything every Firebase-backed Flexweg project needs:
- 6 public Firebase config values (
apiKey,authDomain,projectId,storageBucket,messagingSenderId,appId) - The bootstrap admin email and password
Step 20 — Apply your project's Firestore security rules
The Firebase project is now provisioned, but the database is currently wide open — Firestore started in production mode which denies everything until you publish rules. Every project that uses this Firebase setup ships its own Firestore security rules: an access-control policy that defines who can read or write what.
The rules are project-specific — a Kanban app needs different access patterns than a wiki or a CMS. Head straight to your project's dedicated rules section and paste the ruleset shown there:
- Kanban / ticket manager — rules for the kanban (tickets, sprints, comments, users with admin/editor roles).
- Notion-like wiki — rules for the wiki (pages, mentions, per-page sharing).
- Flexweg CMS — rules for the CMS (posts, terms, media, settings, plugin configs).
Every ruleset contains a placeholder email that pins the bootstrap administrator. It looks like this:
function isBootstrapAdmin() {
}
Replace [email protected] with the exact email you used in Step 18 (the user you just created in Firebase Authentication). The comparison is case-insensitive but the value in the rules must be lowercase — the rule applies .lower() to the JWT email before comparing.
If you leave the placeholder in place, nobody can log in as admin — the rules will silently deny every privileged operation, and you'll get cryptic permission-denied errors when the app loads.
After you've published your project's rules, return to that tutorial — the next steps cover the .env configuration and the deploy.
Used by
Tutorials that build on this setup:
- Deploy a ready-made Kanban / ticket manager — a Jira-like backlog + sprint app with role-based auth.
- Deploy a ready-made Notion-like wiki — a block-editor wiki with mentions, per-page sharing and one-click HTML publishing.
- Flexweg CMS — Firestore security rules — apply the CMS-specific rules after completing the shared Firebase setup.
More projects coming soon. If you're writing a new tutorial that uses Firebase, reference this page from your "Step 1 — Set up Firebase" instead of duplicating the screenshots.